

The Best Resin 3D Printers of 2021 – Here’s How to Pick the Right One for You
Posted by admin on
If you know a thing or two about 3D printing, then you’re probably familiar with the differences between FDM and SLA-LCD-DLP printing. Many folks refer to these two categories as filament and resin printing, as it better captures the general idea of these concepts. In fact, their very names are quite intuitive, or better yet, self-explanatory.
As such, we’ve got filament printers where you must load filament from a spool into the extruder of the unit. Afterward, the extruder feeds the filament through a hotend, which melts it, and pushes it through a heated nozzle to create marvelous designs.
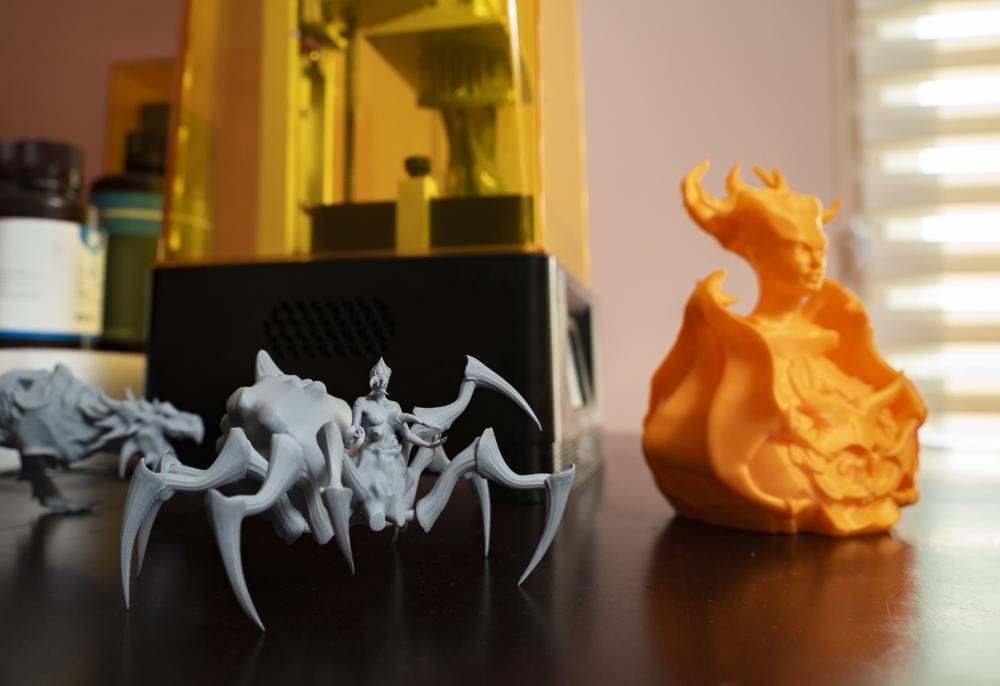
However, with resin 3D printers, things are entirely different. If you’ve ever been a fan of swamp monster movies, then you’ll definitely enjoy watching resin printers pulling intricate works of art out of a puddle of resin. It’s simply amazing.
We won’t keep you a lot talking about the wonders of printing 3D stuff with resin, as we’re pretty sure you already know that they’re generally used to print smaller, more precise parts. Instead, we’re going to present you a list of all the best 3D resin printers your money could buy in 2021.
To make things easier for you, we carefully organized the 3D printers by creating categories based on price range and included the units in them. That way, you can head to the category that suits your budget and carry on from there. The price range categories are:


Best Resin 3D Printers In 2021
| Resin printer | Price |
|---|---|
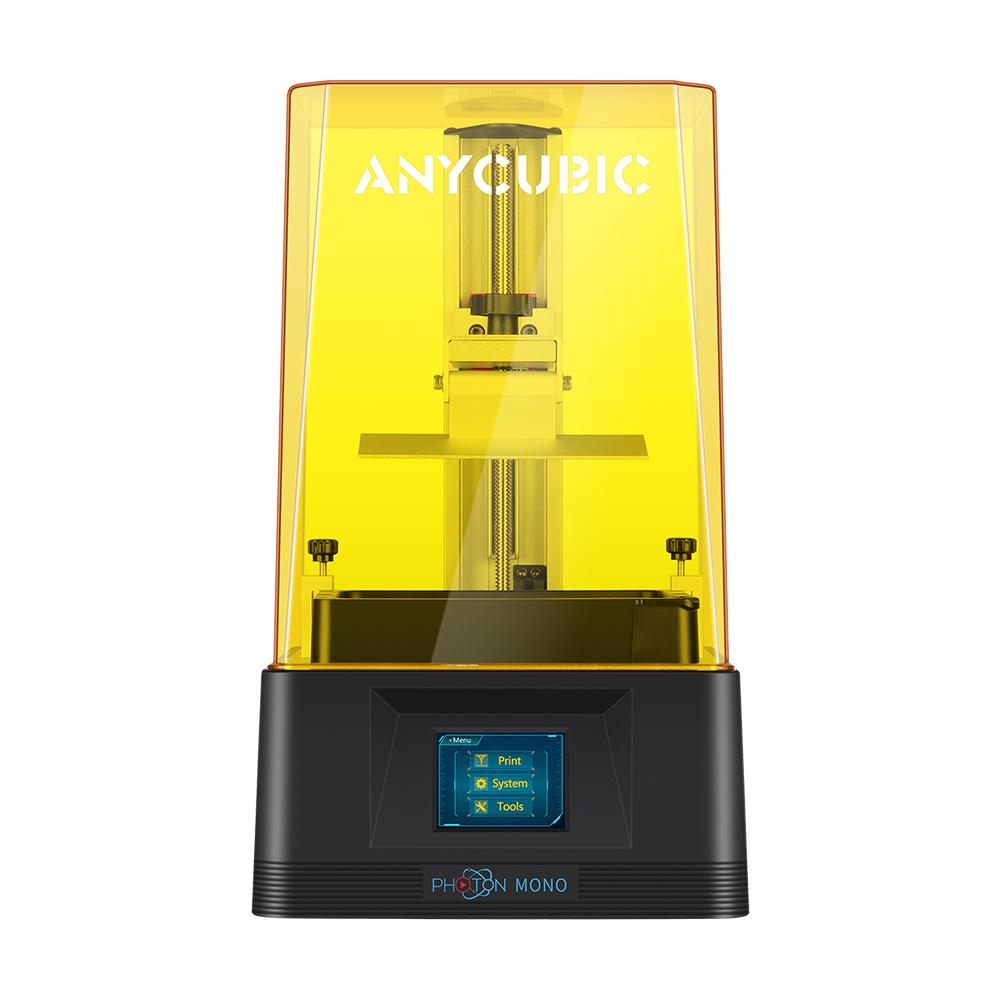
| Anycubic Photon Mono | $249 |
| Phrozen Sonic Mini | $269 |
| Elegoo Mars 2 Pro | $250+ |
| Anycubic Mono X | $700 |
| Peopoly Moai 130 | $1,395 |
| Prusa SL1 | $1,299 / $1,599 |
| Peopoly Phenom | $1,999 |
| Uniz Slash Plus | $1,999 |
| Zortrax Inkspire | $2,150 |
| Formlabs Form 3 | $3,499 |
The Best Budget Resin 3D Printers (Under $1,000)
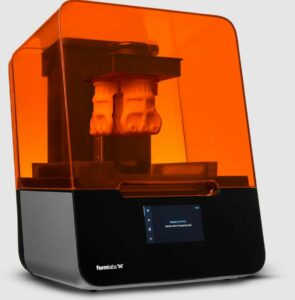
1. Anycubic Photon Mono
Anycubic Photon Mono is hands down the most popular choice when it comes to budget resin 3D printers, as it’s one of the cheapest models on the market, if not the absolute cheapest one there is.
Usually, there’s this stigma that resin 3D printers carry around, that they’re expensive, and if you were on a budget, you’d better stick with an FDM printer. However, with the Anycubic Photon Mono, you don’t have to put your projects on hold or compromise for the sake of not going over your budget.
We’re fully aware that we’re in the ‘Under $1,000’ category, and this could mean anything from $1 to $999, but you’ll be delighted to learn that the Anycubic Photon Mono can be bought for roughly $249 from the official store.
If you wanted to go even lower with the price, we’re absolutely positive you’ll find some used ones on the market. However, there are a few things we need to set straight about this resin 3D printer. We got the price out of the way and already established that it’s a cheap unit, but here’s our anchor point.
The fact that it’s one of the cheapest resin 3D printers on the market comes with a bunch of drawbacks. First of all, the Anycubic Photon Mono has one of the smallest build volumes on the market, and it makes perfect sense considering that the low price range of this product.
In fact, resin printers that cost more are more likely to have larger build volumes, so if you’re not prepared to invest $200 – $300 in a resin printer that has a small build volume, then you might want to move further down our list.
Now to be a bit more specific, the Anycubic Photon Mono has a maximum build volume of 130 x 78 x 165 mm or 5.11 x 3.14 x 6.49 inches, which means that you won’t be able to craft objects that surpass these values.
Many crafters find these values more than enough to work with, but others prefer a wider build surface. While the obvious choice would be simply moving to an FDM (filament printer), some makers would rather keep the same level of detail that resin printers offer. In this case, unfortunately, the only viable option would be finding a resin printer with a larger build volume, despite it being more expensive.
The Anycubic Photon Mono is not the first model in the series. In fact, it’s an upgraded version of one of the earlier models, and it brings a plethora of upgrades along to prove it, including but not limited to precision improvements, increased resin printing speed, and a larger build volume (believe it or not).
Anycubic Photon Mono comes with a high-precision 2K LCD screen that’s proven to be more than enough for most hobbyist makers who own 3D resin printers. However, if your needs are more sophisticated and you wish for more accuracy from your 3D printed models, you might want to move to a printer that has a 4K LCD screen. For instance, the Anycubic Mono X encompasses this kind of technology, as we’ve discussed further down in our guide.
Older Photon models had a maximum printing speed of roughly 20 mm per hour, which the Anycubic Photon Mono has easily surpassed. With this printer, you can reach a maximum speed of 50 mm per hour, which is more than double (150% increase).
Another upgrade that’s worth mentioning is the improved Z-axis and a new dual linear slide system that can now ensure greater stability during the actual printing process. As you probably know, more stability translates into prints that are more accurate, meaning that you’ll have high-quality surface finishes on your models and layer lines that are less visible.
To wrap it up, if you’re in the market for cheap 3D resin printers and don’t care much about the maximum build volume, then the Anycubic Photon Mono is exactly what you’ve been looking for. It has great printing speed, provides you with great accuracy, and it even costs less than some budget FDM printers.
View price on Amazon2. ELEGOO Mars Pro / Mars 2 Pro
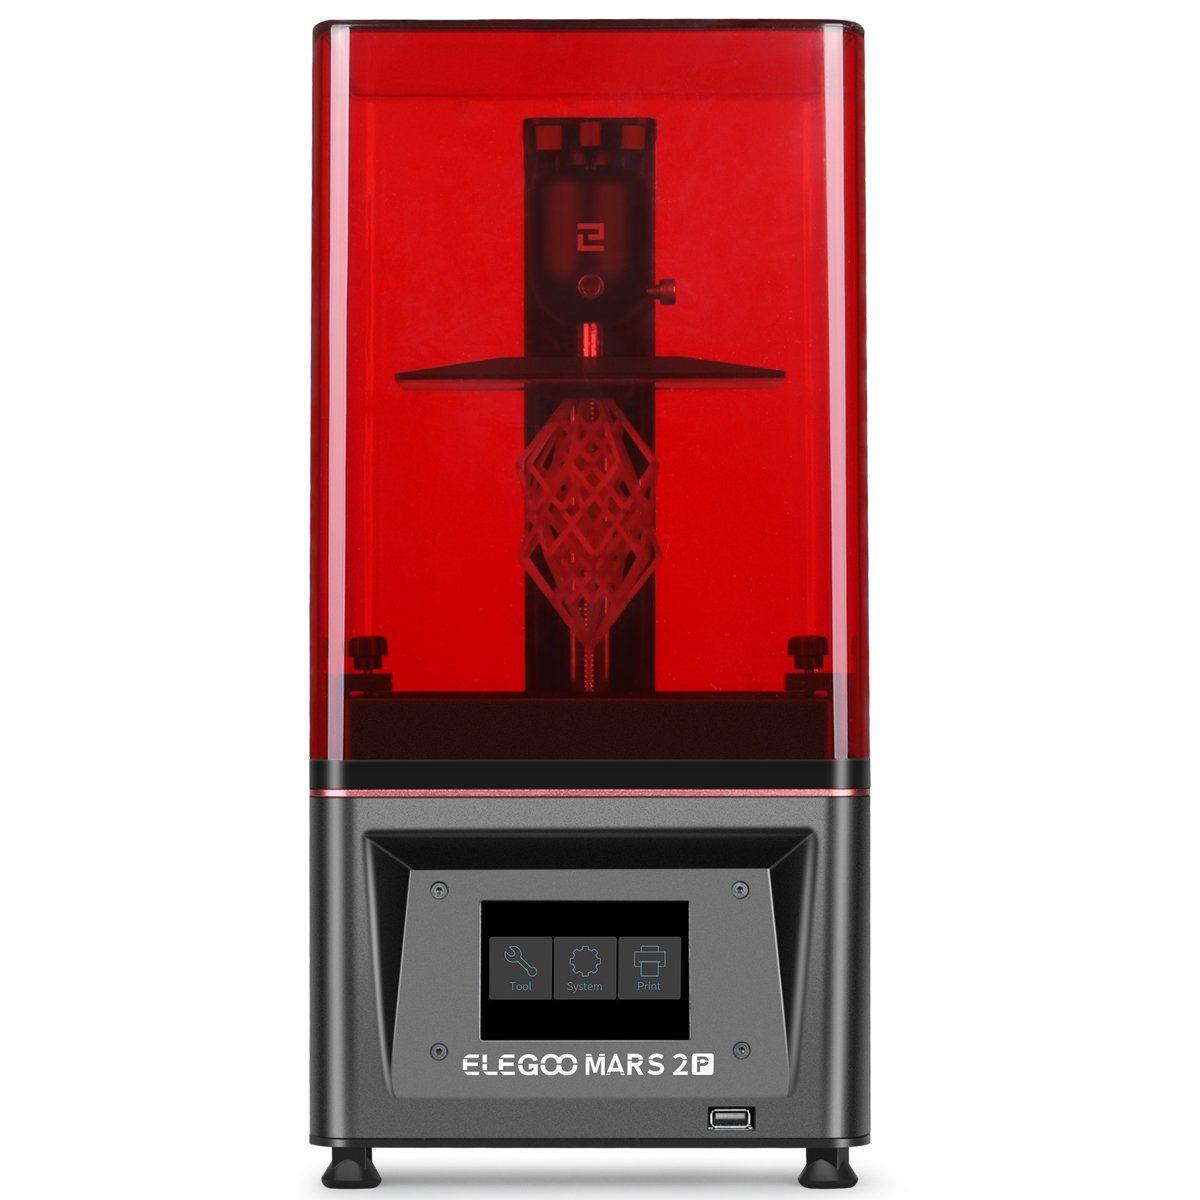
ELEGOO Mars Pro is in the same price range as the Anycubic Photon Mono. In fact, if you’re into nitpicking, the Mars Pro model costs $1 more than its counterpart from Anycubic, but we’re not here for that. You’re looking for budget resin printers, and we want to give you as much information as possible about this specific one.
First of all, the build surface. The ELEGOO Mars Pro has a maximum build volume of 115 x 65 x 150 mm, which is even smaller than the Anycubic one. As before, if you’re not ready to compromise on build volume, you should consider scrolling down and finding a different unit that could accommodate this requirement of yours.
If you’re fine with it, then keep on reading. You should know that the ELEGOO Mars Pro 2 version has a slightly larger build volume of 129 x 80 x 160 mm, but it costs a bit more than the ELEGOO Mars Pro model. Notice that even the Mars Pro 2 model has a smaller build surface than the Anycubic Photon Mono.
However, despite its reduced build volume, the ELEGOO Mars Pro shines in other departments such as precision, safety, intuitiveness, sturdiness, quality of prints, and consistency of results.
First of all, the Z-axis of the ELEGOO Mars Pro uses a linear guidance system that can ensure greater stability and a steadier motion during the printing process, which in turn translates in more accurate prints that are smoother and have fewer layer lines or less-visible ones.
Even the build plate’s set screws have been upgraded to larger, anti-slip hexagon socket ones. This may not seem like much, but even an apparently small improvement such as a screw set upgrade has a massive impact on the overall stability of the printer. The screw set upgrade leads to a more stable leveling process.
The building plate comes with a turning CD pattern that increases the adherence of your prints to the surface, especially if you’re creating larger 3D resin models.
Now here’s something that almost nobody talks about: printing with resin usually emanates an unpleasant odor. On the bright side, there’s not a single resin 3D printer on the market that doesn’t come with an enclosure, so you’d think that the odor won’t be a problem to you.
However, here’s the thing about enclosures: if they’re not properly sealed, they won’t do much in terms of protecting your nostrils from the unpleasant smell that your resin printer will generate while you’re using it.
Now here’s the great news about the ELEGOO Mars Pro: it comes with a silicone rubber seal that you can place on the cover of the printer in order to prevent any kind of odor coming from the resin.
Furthermore, there’s an activated carbon filter that’s built within the enclosure that will help absorb and filter the odor of the resin before it will be eliminated through the ventilation shaft of the cooling fan. As a result, you’ll be able to enjoy a cleaner printing experience with no odor whatsoever.
ELEGOO Mars Pro features a 2K LCD projector that can create models with a minimum layer height of 0.01 mm and offers a decent speed for a resin 3D printer in that price range. It also encompasses an array of 28 50W UV LED lights that project light evenly, which creates accurate prints and can save you a lot of time by reducing exposure time by 25%.
Another interesting thing about the ELEGOO Mars Pro is that it’s reportedly the first resin printer that uses the CTB format for sliced files, which means not only a 90% reduction in file size (compared to the CBDDLP format), but also an increase in printing success rate for large models.
If you like the overall presentation of the ELEGOO Mars Pro but feel like its features are not quite enough for you, then you should know that there’s an upgraded version called the ELEGOO Mars Pro 2 that has a bunch of upgrades compared to the standard unit. Check out the main differences below:
| Elegoo Mars Pro | Elegoo Mars 2 Pro | |
|---|---|---|
| Max. Build Volume | 120 x 68 x 155 mm | 129 x 80 x 160 mm |
| Resolution | 2560 x 1440 pixels | 2560 x 1620 pixels |
| XY Resolution | 0.047 mm (47 Micron) | 0.050 mm (50 Micron) |
| Cure Time (Per Layer) | 6 seconds | 1 – 2 seconds |
However, if you want the ELEGOO Mars Pro 2, you’ll obviously have to pay a higher amount of money. To be more specific, the upgraded version of the ELEGOO Mars Pro (i.e., the ELEGOO Mars Pro 2) should cost you about $80 more, bringing you to a grand total of $330.
All things considered, if you’re looking for an affordable 3D printer that can provide you with a great level of accuracy, printing speed, layer height, resolution, and smart odor elimination, then the ELEGOO Mars Pro is what you need. If you like the ELEGOO Mars Pro but feel like you’d like a bunch of improvements, you should consider upgrading to an ELEGOO Mars Pro 2.
View price on Amazon3. Phrozen Sonic Mini
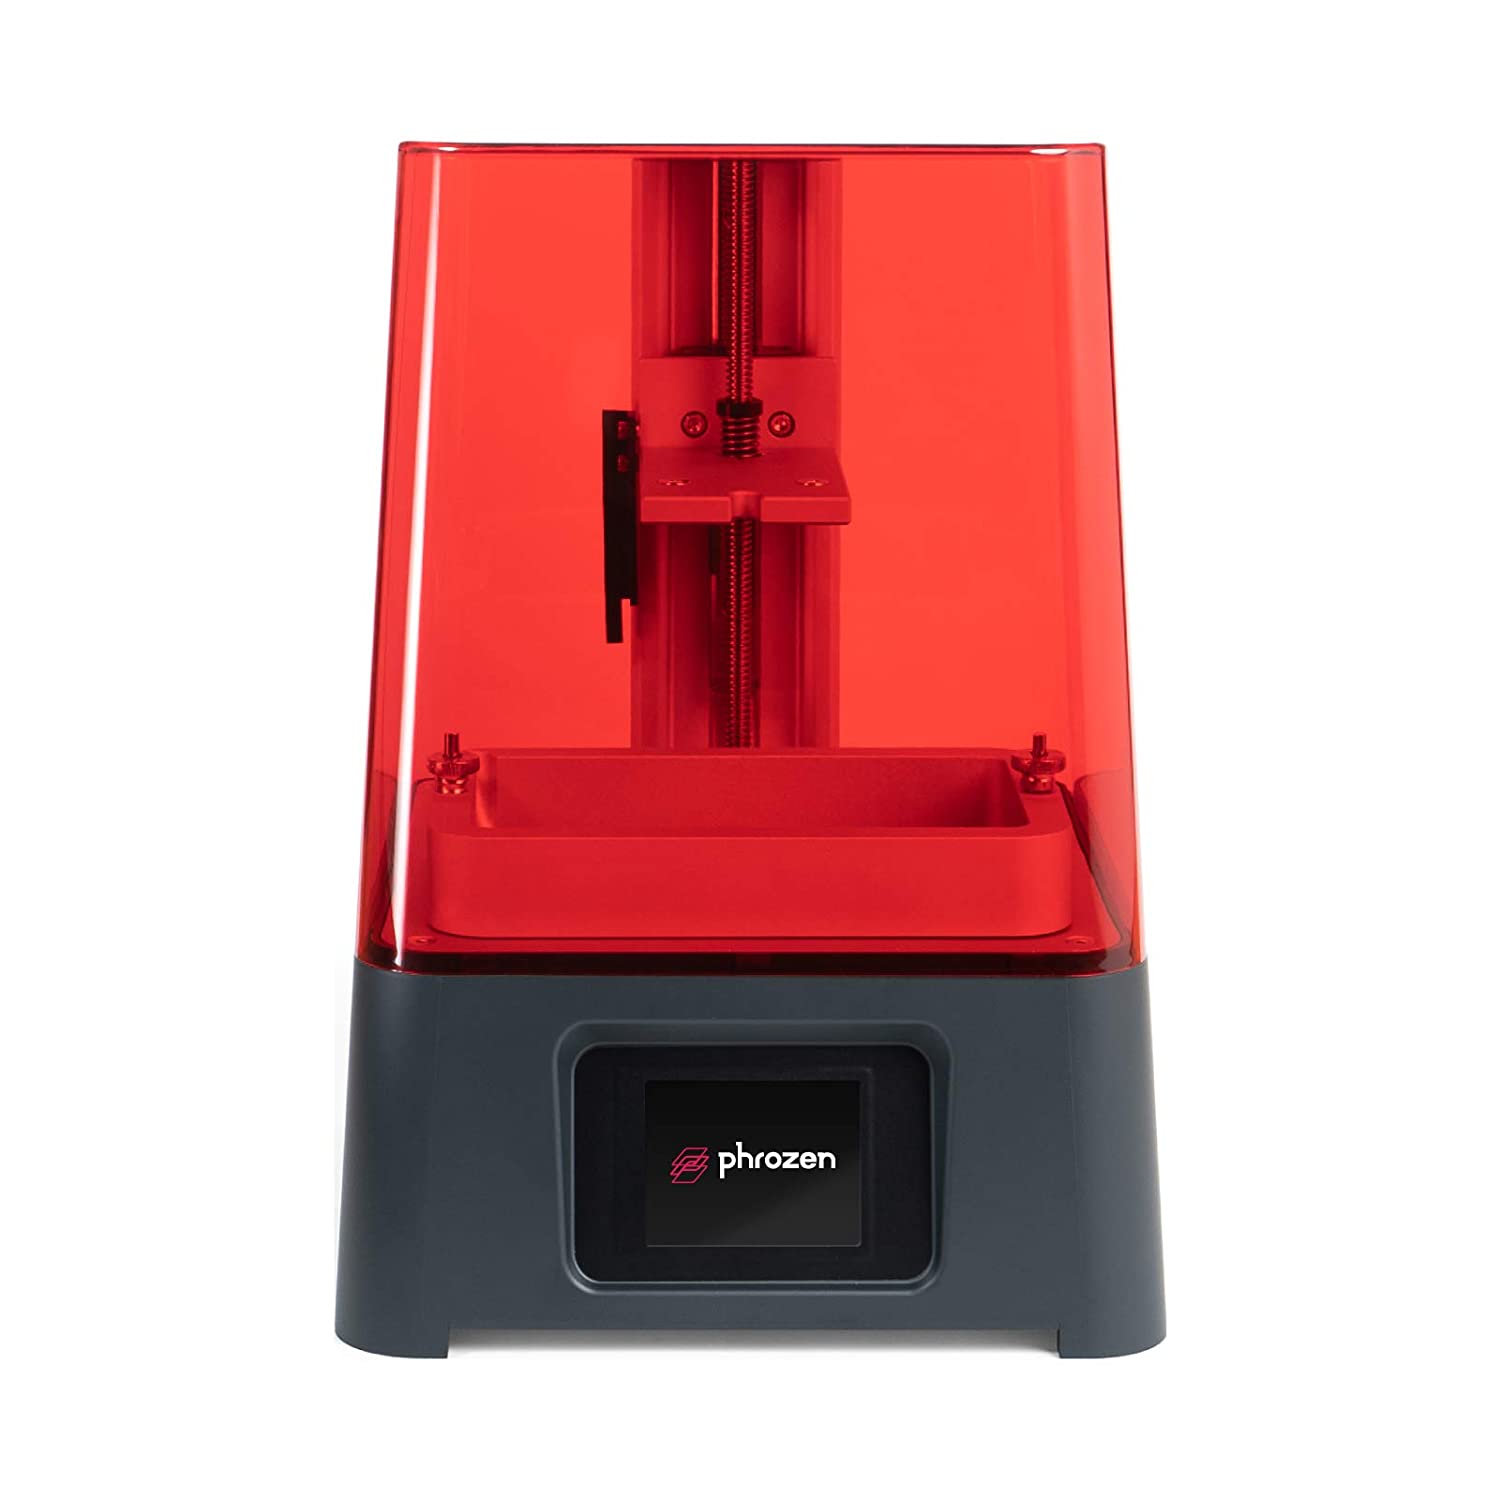
If you’re new to 3D printing or just need a unit that won’t cost you a fortune and will get the job done fast and nicely, Phrozen Sonic Mini is currently one of your best choices. This unit combines fast printing speeds, high precision, and a low market price, so it should be more than enough to kickstart your resin 3D printing projects.
Although you may start to believe that there’s a pattern starting to form, the Phrozen Sonic Mini doesn’t have a large build volume. The same goes for most, if not all, budget resin 3D printers on the market, and you’ll probably notice that even some of the more expensive ones don’t excel in terms of build volume.
To be more specific, the Phrozen Sonic Mini provides you with a 119 x 66 x 130 mm build volume. Thus, we can all agree that the build volume is not exactly one of this unit’s strongest points.
The Phrozen Sonic Mini features a 5.5-inch 1080P LCD printing area that can accommodate a 1920 x 1080 full-HD resolution. This unit can print at 62.5µm and has a printing area of 5.5 inches.
The monochrome LCD screen ensures that you’ll be able to create your models up to 4 times faster than with similar other 3D printers, as this unit takes only two seconds to print a single layer and prints at a great speed of 80 mm per hour.
One of the things that make Phrozen Sonic Mini one of the most attractive resin 3D printers on the market (aside from its ridiculously low price) is its intuitiveness. All you have to do to start printing with it is transferring your sliced 3D object to a USB drive, plug the USB flash drive in the printer, tap a few buttons and just wait for the print to finish.
It’s so easy to operate that even a complete novice should be able to create intricate works of 3D art in merely minutes after properly configuring the unit. The 2.8-inch touch panel lets you operate the printer without significant effort.
Surely enough, you might want to take your time to grow accustomed to the unit and its impressive range of features, but we’re quite confident that you can start printing awesome resin projects in no time.
Unfortunately, there’s no other way to connect to the printer other than USB, so you won’t be able to, say, connect it to your network via Ethernet or Wi-Fi and interface with it from a distance.
The light source that the Phrozen Sonic Mini uses is a 405 nm ParaLED Matrix 2.0, which ensures that you’ll create accurate prints without having to wait too much. As we’ve previously mentioned, the Phrozen Sonic Mini can print at a speed of 80 mm per hour, which is quite impressive considering the low price of the unit.
Last, but not least, it’s worth mentioning that the Phrozen Sonic Mini can create objects with a layer thickness value between 0.01 mm and 0.3 mm. All these features combined will ensure that you’ll always create accurate objects with fewer layer lines, or at least ones that are not exactly noticeable.
On the other hand, if you feel like the Phrozen Sonic Mini is simply not enough for your resin 3D printing needs, you may consider upgrading to a better model, the Phrozen Sonic Mini 4K. As its name clearly suggests, this printer has a 4K, 3840 x 2160 Ultra-high-definition printing area.
It can print at 35µm with a whopping 722 PPI (which is currently the highest PPI on the market) and offers a broad printing area of 6.1 inches. If you want to learn more about the differences between the Phrozen Sonic Mini and the Phrozen Sonic Mini 4K, just take a look at the table below:
| Phrozen Sonic Mini | Phrozen Sonic Mini 4K | |
|---|---|---|
| Build Volume | 120 x 68 x 130 mm | 135 x 75 x 130 mm |
| LCD Resolution | 1920 x 1080 pixels | 3840 x 2160 pixels |
| XY Resolution | 0.062 mm (62 Micron) | 0.035 mm (35 Micron) |
| File Type | phz | ctb |
As you can see, not only does the 4K model come with better LCD and XY resolution, it’s also able to handle CTB files, which are reduced in size and a better choice for bigger builds, and features a larger build volume so you can create larger models.
Obviously, considering that the Phrozen Sonic Mini 4K model has a few improvements compared to the standard, non-4K model, you’ll have to pay more for it. To be more specific, you could buy the Phrozen Sonic Mini 4K for about $399, or if you’re lucky enough to stumble upon a promotional offer, you could grab it for as low as $349.99.
To wrap it up, if you’re looking for a great resin 3D printer that you can get on a budget, then the Phrozen Sonic Mini is exactly what you need. It can help you create accurate prints with fewer layer lines, has great speed, and is intuitive enough that even novices can use it without breaking a sweat.
Alternatively, if you feel that the Phrozen Sonic Mini just doesn’t cut it, and you’d prefer a unit with a higher LCD and XY resolution and a larger build volume, then you should consider getting the Phrozen Sonic Mini 4K.
View price on Amazon4. Anycubic Mono X
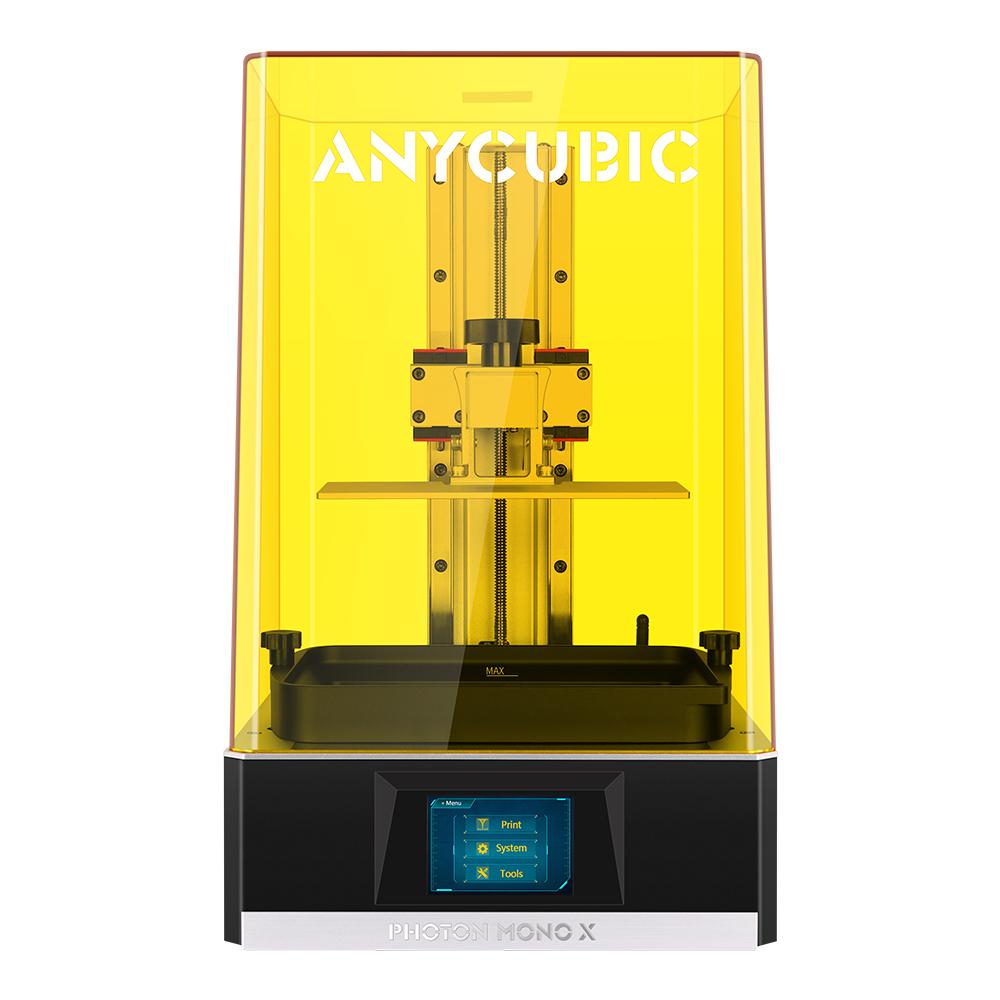
With the Anycubic Mono X, we’re finally breaking the cycle of resin 3D printers that have reduced build volumes. At least compared to the other printers in our guide so far, the Anycubic Mono X is an absolute beast of a machine that packs a whopping 192 x 120 x 245 mm.
This means that you could create objects as tall as 245 mm using this machine without compromising on the quality of the print. You’ll still get the same level of detail, but at a much larger scale, and that opens up an entire world of possibilities to you as a passionate maker.
But don’t get it the wrong way; the large build volume isn’t the only thing that placed the Anycubic Mono X on our guide as one of the best budget resin 3D printers on the market. In fact, this model has a lot of aces up its sleeve, and we’ll discover them together in these few next paragraphs.
For starters, the Anycubic Mono X has a 4K LCD screen, whereas all of the printers (except the Phrozen Sonic Mini 4K) in our guide so far only have 2K LCD screens. To elaborate more on the build surface of the Anycubic Mono X, it has an 8.9-inch 4K monochrome LCD, which ensures you’ll have larger prints without compromising on accuracy or detail.
The build surface of the unit can accommodate objects that are 192 mm long, 120 mm wide, and 245 mm tall, which we have to mention once again is an impressive trait for a resin 3D printer.
If you’re worried about speed, then you should be thrilled that compared to some of its older models, the Anycubic Mono X can create 3D printed objects three times as fast. This means that you won’t spend as much time waiting for the print to come to an end.
To be more specific, the Anycubic Mono X can reach a maximum printing speed of 60 mm per hour, which is higher than most of the printers we’ve included in our guide. Furthermore, the Anycubic Mono X has a low exposure time of 1.5 – 2 seconds, which further contributes to the timely delivery of your final product.
The unit comes with a 3.5-inch touchscreen that you can use to interface with the printer without significant effort, which makes this unit great even for 3D printing novices. The 3D printer also comes with an increased level of safety, which is also something that novices will definitely enjoy.
The safety feature will immediately turn off the printer if you remove the top cover so that you can avoid any accidents by interacting with some of the printer’s moving parts. However, this feature is disabled by default, so you’ll have to enable it manually.
The Anycubic slicer software has a lot of features to ensure that you’ll always get a detailed, accurate print in no time. For instance, you’ll be thrilled to find out that the slicing utility supports fast slicing, 8x anti-aliasing, text paste, hollowing, and split model.
Anycubic Mono X’s Z-axis has been upgraded from previous models to a dual linear rail system, clearance nut, and stepper motor combo to ensure that your prints will have far greater stability, all the while eliminating layer shifting issues.
The light source was also upgraded to a new matrix UV light source with high-quality quartz lamp beads and a new matrix design to ensure that the UV light energy is distributed evenly on the entire surface of the resin printed object. The 4K monochrome LCD is also a quintessential part of delivering high-quality prints with the Anycubic Mono X.
If you’re worried about always having to stay in the proximity of your printer, then you’ll probably sigh in relief after you find out that the Anycubic Mono X has a mobile remote control app that lets you control your printing operations, monitor printing progress, and adjust the unit’s settings from a distance.
Last, but not least, the Anycubic Mono X features an awesome UV cooling system that can further increase the quality of the overall printing process by increasing its stability and also improving the lifespan of the unit by dissipating unnecessary heat generated by the UV lamps.
If you need a more detailed list of features of the Anycubic Mono X to make up your mind about it, you can check it out below:
- Comes with a 3.5-inch touchscreen that lets you perform various operations
- Features a mobile app that lets you control the printer, monitor the printing process, as well as adjust various settings
- Has USB connectivity, so you won’t have to figure out ways to place files on SD cards (e.g., buying an SD card reader)
- Uses LCD-based SLA technology
- Features high-quality filament of 405 nm wavelength as a light source
- Anycubic Mono X has an XY resolution of 0.05 mm 3840 x 2400 (4K) for better accuracy and incredibly detailed models
- Has a Z-axis resolution of just 0.01 mm
- The Anycubic Mono X can print at a layer height value of merely 0.01 – 0.15 mm
- Can reach a maximum 60 mm per hour printing speed
- Compatible with 405 nm UV resin
To wrap things up, if you’re in need of a resin 3D printer that has a generous build volume, can get your prints done quickly, has a great resolution, can generate incredibly detailed prints, and is incredibly easy to use, then the Anycubic Mono X is exactly what you’ve been looking for.
Sure, it has a much higher price (more than double) than most of the resin 3D printers we’ve already included in our guide, but its increased price is well justified by the level of quality, speed, and build volume that the Anycubic Mono X has in store.
If you feel like the Anycubic Mono X is a bit much for your taste in terms of money but also features (hey, some makers can find certain features unnecessary for their project requirements), then you should head for one of the models in the Photon series.
For instance, the Anycubic Photon Mono (which we already included in our guide) is a solid choice if you’re not exactly ready to spend more than $300 on a resin printer. It’s definitely not as powerful as the Anycubic Mono X, but it costs less and gets the job done just right.
View price on AmazonThe Best Desktop Resin 3D Printers ($1,000 – $3,000)
1. Peopoly Moai 130
Peopoly Moai 130 is a special piece of machinery, seeing as it’s the only DIY resin 3D printer that we’ve decided to include in our guide. Usually, resin printers come pre-assembled so that you don’t have to do anything else but unbox them, plug them into a power source, turn them on and start printing.
Well, some printers can also require some light calibration, but you get the point; aside from pressing a few buttons or turning a few knobs, there’s little that you need to do after you receive most of the resin 3D printers on our list.
Things are different with the Peopoly Moai 130, considering that it’s a DIY project. This basically means that you won’t just have to unbox it, but assemble and configure it yourself, which could take you quite some time, especially if you’re not exactly familiar with what it takes to put together a 3D printer.
I’ve found building a 3D printer to be a great experience, seeing as it can also help you troubleshoot various issues that may arise as a result of a malfunction somewhere between the entrails of your unit, and Peopoly Moai 130 puts you in this exact situation.
Furthermore, putting together a 3D printer from scratch also helps you grow accustomed to every single component of your machine, whether it’s a screen, a build plate, a control unit, a bunch of wires, or a set of screws and nuts we’re talking about.
The next time you’ll be asking a question on an online forum, you’ll actually know what some of the tech whizzes down there are talking about when they direct you to increase the laser power, replace the interfacing layer, clean the optical path, or level the bed or vat.
It’s worth mentioning that even without prior experience, it should take you somewhere around 6-7 hours to put the Peopoly Moai 130 together and get it started. The assembly manual offers clear instructions and pictures, and you can always find a lot of video resources online if the text & pictures combo doesn’t cut it for you.
Once you manage to put the Peopoly Moai 130 together and start it, you’ll be nothing short of amazed by its capabilities. The Peopoly Moai 130 encompasses a laser spot size of just 70 microns, which is way more accurate than most (if not every) average FDM 3D printers on the market.
Furthermore, this unit is able to reach layer heights as low as 10 microns, which is truly remarkable for its low price range. Another thing that you’ll be able to enjoy with the Peopoly Moai 130 is how fast it can render the prints, which makes it an ideal printer for jewelry or dental molds, or for quick prototyping.
The Peopoly Moai 130 features a build volume of 130 x 130 x 180 mm, which is not exactly large, but it’s quite enough to work with if you don’t plan to create large objects. In fact, if you don’t plan to exceed 13 cm in length, 13 cm in width, and 18 cm in height for your objects, the Peopoly Moai 130 is just a perfect fit for you.
There’s an FEP vat included within the printer kit that will ensure higher durability. Furthermore, the Peopoly Moai 130 has an “Easy-To-Level” build plate that is specially designed to make the leveling process much easier.
Leveling the Peopoly Moai 130 goes like this: you just have to loosen the four screws on the build plate, lower the build plate to the vat, and then tighten the four screws back up. It’s so easy even a complete beginner could handle this task with zero chance of failure. Furthermore, you can use the same leveling system to add extra volume to the resin.
The heater is controlled by a sensor and can keep the resin at an optimal temperature of between 20 and 30 degrees Celsius (between 68 and 86 degrees Fahrenheit). That way, you won’t have to worry about having to wait a long time before your resin reaches the optimal temperature each time you want to create a new project.
The Peopoly Moai 130 can reach a minimum layer height of 5 microns thanks to its mechanical structure. However, you should understand that the print layer
height is strictly dependent on the type of resin you’re using.
Most like many other resin 3D printers, Peopoly Moai 130 features a UV LED light source that’s used in the post-curing process. That way, your prints will always look good, without layer lines or with ones that are not exactly noticeable with the naked eye.
One interesting thing about the Peopoly Moai 130 is that it can print via GCODE. Most resin printers work with various other formats, such as CBDDLP, or CTB, but with Peopoly Moai 130, you can slice your 3D models in the same slicer software utilities as you would with FDM 3D printers. If you’re familiar with Cura, Prusa Slicer, or other similar tools, things should be perfectly smooth.
The Peopoly Moai 130 is also compatible with a broad variety of resins, ranging from specialty resins to ones that are more accessible (price-wise), so that you can experiment with various colors and materials.
If you’re a developer or the tinkerer type and you like to change various settings, you’ll be delighted to learn that the Peopoly Moai 130 provides you with full access to the laser exposure settings. That way, you can experiment with various settings until you reach the sweet spot.
To wrap it up, if you’re looking for a relatively cheap, but accurate, effective, and intuitive resin 3D printer, then the Peopoly Moai 130 may be exactly what you need. Note that you’ll receive a DIY kit that you’ll have to assemble yourself, but the assembly process shouldn’t take longer than 6 hours and could provide you with a lot of insight into what’s going on in your printer and help you develop new tinkering skills.
2. Prusa SL1S SpeedS Speed
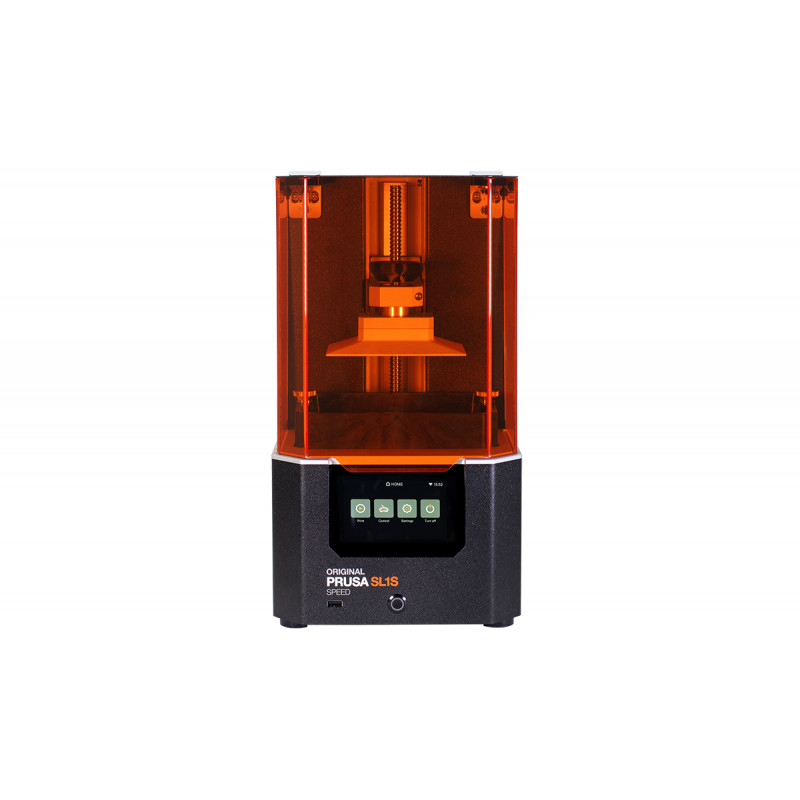
Prusa SL1S Speed is a 3D printer that should need no introduction. Well, actually, Prusa (the company) is the one that needs no introduction, as it slowly secured its position as one of the most reliable 3D printer manufacturers on the market.
The Prusa i3 MK3S+ is the most popular model sold by this manufacturer, and it’s an absolute beast and workhorse of a printer, and we like to believe that it’s one of the reasons why Prusa has become so popular among makers worldwide.
While we’re not here to discuss the MK3S+, it’s a starting point of this section; since the Prusa i3 MK3S+ is widely regarded as being one of the most sturdy, reliable, and efficient FDM 3D printers on the market, we expect nothing less from the Prusa SL1S Speed.
It goes without saying that the Prusa SL1S Speed is not an FDM printer, as it can only process resin into intricate works of art. Therefore, it has a different way of functioning, and most of the features that you can find on an FDM printer will be absolutely absent from the Prusa SL1S Speed. But let’s start at the beginning.
First of all, it’s worth mentioning that the Prusa SL1 used to have a build volume of 120 x 68 x 150 mm. It’s safe to say that the build volume wasn’t one of Prusa SL1’s strongest points, but we assure you that there were a lot of other perks to compensate for the lack of a larger build volume.
However, nowadays, things have changed, and with SL1’s upgrade to Prusa SL1S Speed, the printer received an increase in build volume. Thus, nowadays, the printer has a 127 x 80 x 150 mm build volume, which is not a dramatic increase, but it’s still a bit better than its previous version.
To put it shortly, as long as you don’t plan to go overboard with objects that are longer than 12.7 cm, wider than 8 cm, and taller than 15 cm, you should be perfectly fine with the Prusa SL1S Speed.
On the other hand, many users aren’t willing to compromise on build volume and not because they craft large objects on a regular basis, but because they’d like at least to have the option to create objects of those dimensions, and sadly that’s a requirement that the Prusa SL1S Speed can’t accommodate.
Now, if you’re at least a bit familiar with Prusa, you probably know that the original resin printer was called the SL1, and it goes without saying that the Prusa SL1S Speed brought a variety of upgrades to the table. We’re going to name a few in the following section.
The Prusa SL1S Speed comes with a 25% increase in the maximum build volume, greatly improved printing quality, and printing speeds of up to three times faster than its predecessor. Prusa SL1S Speed only takes 1.4 seconds of exposure time per layer (while using transparent resin and at a low layer height).
These short exposure times per layer combined with the tilt mechanism that’s built within the Prusa SL1S Speed make it possible that you can print an object that’s up to 150 mm in height in just two hours. This is a performance that few other resin 3D printers can achieve.
If you’re a fan of creating 3D prints that have an amazing level of detail, then the Prusa SL1S Speed is definitely right up your alley. Not only can this printer create intricate objects that are extremely detailed, but it also manages to do that quickly so that you don’t have to wait around for a design to come to an end.
One of the most attractive features of Prusa printers is their upgradeability. This basically means that you never have to buy a brand new device if you already have an older model. Prusa sells upgrade kits (along with firmware and driver upgrades) that can be easily applied to the older model that’s in your possession so that you can upgrade it to the latest model.
The Prusa SL1S Speed makes no exception, so if you’re already the proud owner of a SL1 resin 3D printer from Prusa, you can simply buy the upgrade kit and follow the embedded instructions to turn your old SL1 into a brand new Prusa SL1S Speed.
The Prusa SL1S Speed comes with a new 5.96-inch monochrome LCD that has a physical resolution of 2560 x 1620p. This, in turn, along with the improved optics system, enables the Prusa SL1S Speed to provide you with amazing print quality.
The custom-made optics system as well as the UV LED panel that has been embedded in the Prusa SL1S Speed help the printer reach an amazing speed of only 1.4 seconds per layer. This perk is extremely handy if you’re creating prototyping projects or engage in small-scale production. In other words, the Prusa SL1S Speed enables you to print more objects in less time, at least compared to its predecessor.
Prusa has used a sturdy aluminum body to build the SL1S Speed 3D printer in order to minimize the level of vibrations as well as to ensure that you can achieve the best printing performance, regardless of print size, accuracy, or resolution. Prusa SL1S Speed also comes with a quick-release mechanism that facilitates the Z-axis calibration.
The Prusa SL1S Speed features full support for the PrusaSlicer, which means that you can benefit from its full range of capabilities, including but not limited to hollowing, easy object manipulation, generating supports automatically, as well as dozens of profiles for various types of resins.
As opposed to some other similar resin printers, the Prusa SL1S Speed features wireless connectivity, which means that not only can you upload print files over the network, but you can also perform OTA (over-the-air) firmware updates and monitor your printer remotely.
However, there’s also an on-premise interface that lets you interact with the printer in various ways. Thus, whether you want to access network features, check on support files, recalibrate your printer, or access advanced settings, Prusa SL1S Speed’s touchscreen will let you do that in no time.
To wrap things up, if you need a competent, sturdy, accurate, and fast resin 3D printer you can count on, the Prusa SL1S Speed is definitely worth checking out. It may not have the largest build volume on the market, but it sure has an impressive collection of advanced features to make up for it.
3. Peopoly Phenom
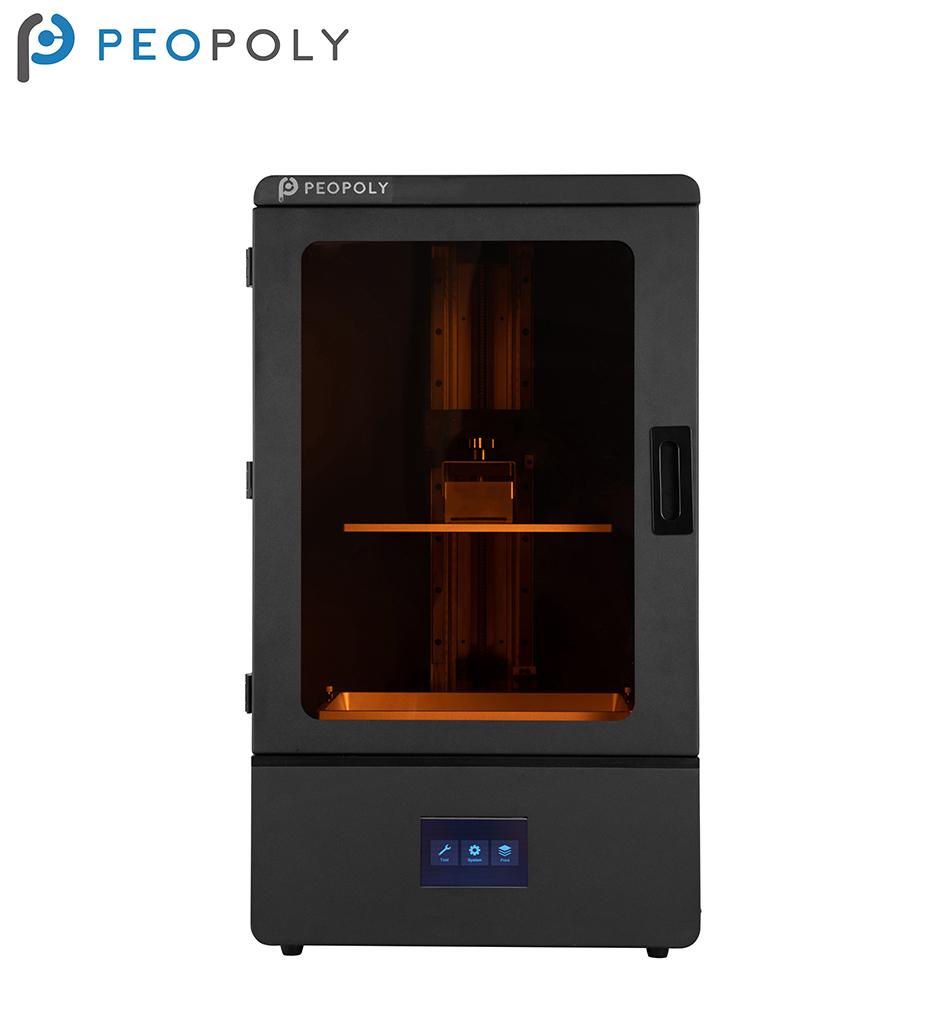
The Peopoly Phenom is a resin printer that uses the mSLA technology. mSLA, which stands for Masked Stereolithography, is a technology that involves printing an object layer by layer while using an array light source as well as a digital mask placed above it. This technology means that entire layers are exposed to the light source at once, as opposed to SLA printers that only expose certain parts of a single layer until every part of the layer has been exposed, before moving on to the next layer.
As a result, mSLA 3D printers are not only more effective than their SLA-embracing counterparts, but they’re also incredibly faster, as well. Peopoly Phenom uses this technology, which makes it one of the most reliable resin 3D printers on the market at the time being.
However, the fact that it uses mSLA technologies is not the only strong point of the Peopoly Phenom, as it has another ‘huge’ surprise in store for you. It has an incredibly large build volume of 276 x 155 x 400 mm, which is absolutely enormous compared to other similar products on the market.
In fact, the Peopoly Phenom’s build volume is even larger than that of certain FDM 3D printers on the market, which is even more impressive. If you are looking for a resin 3D printer that has a huge build volume, then you should look no further, as the Peopoly Phenom has the largest one in our guide.
This beast of a resin 3D printer actually comes in three sizes, but each size is significantly more expensive than the other. We’ll just mention the sizes briefly in this description, but we’ll elaborate more when we reach the appropriate price range that fits the price of these larger models.
To be more specific, you can find the Peopoly Phenom in the following sizes (build volume sizes, that is):
- Peopoly Phenom – 276 x 155 x 400 mm
- Peopoly Phenom L – 345.6 x 194.4 x 400 mm
- Peopoly Phenom XXL – 527 x 296 x 550 mm
Naturally, the models that have a larger build volume will also cost you a lot more, so you should be prepared to reach deeper in your wallet if you’re in the market for resin printers that can create large models without breaking a sweat.
Thus, while the Peopoly Phenom standard size model only costs $1,999, the Peopoly Phenom L will bring you up for a grand total of $2,499, and its much larger version, the XXL, costs nothing short of $7,499. But as we already mentioned, we’re not going to get into detail here since you’re here for the standard Peopoly Phenom.
Alright, so back to our sheep, the Peopoly Phenom is one of the fastest resin 3D printers out there thanks to the mSLA technology. Whether you plan on printing a large object or a plate full of smaller ones, you’ll always benefit from impressive printing speeds since the entire layer is cured of resin.
The Peopoly Phenom comes with a customized light engine that helps distribute the light evenly for faster, more accurate results, as well as a cooling system that can improve the results of your print while extending the life of your mask at the same time.
Peopoly Phenom relies on a combination of the popular Chitubox firmware and software. Thanks to this feature, even if you already have a smaller LCD printer that you want to upgrade from, the transition will be very smooth.
Another thing worth mentioning is that the Peopoly Phenom allows you to control the exposure levels freely. Be that as it may, you should use the Peopoly Deft resin, especially if you’re a beginner and have no idea what adjusting the exposure levels of your printer could mean for both the unit and/or your prints.
The Peopoly Deft resin is specially designed to be used with large printers and can ensure both an increased lifespan of the LCD screen and a high success rate for your resin prints.
Regarding the lifespan of the panel you can find on the Peopoly Phenom, you can get an average of 400 hours, but it’s worth mentioning that this value can vary from 200 to 800 hours. The panel is considered to be a consumable part, and you can buy it separately and replace it without significant effort.
Other consumables you could purchase if you decide to go with the Peopoly Phenom include an FEP film and, obviously, resin. Although you could go with generic brands, Peopoly recommends sticking with their resin, which can be bought for about $70 per liter.
The Peopoly Phenom has an impressive resolution of 72 um, so you’ll be able to create incredibly intricate works of art, whether you choose to print them at a larger scale or as smaller objects. It’s also worth noting that the volume of Peopoly Phenom’s vat is 1.8 kg.
To wrap it up, if you’re in need of an mSLA printer that comes with a huge build volume and enables you to create not only large objects but also ones that have an extreme level of detail, you should definitely check the Peopoly Phenom out. It has everything you need, and then some.
However, if you find that the already huge build volume of the Peopoly Phenom is simply not enough for you, you’ll be glad to know that the Phenom comes in three flavors: the standard one, which has a volume of 276 x 155 x 400 mm, the L model, which has a 345.6 x 194.4 x 400 mm building volume, and the XXL, which boasts a whopping 527 x 296 x 550 mm print volume.
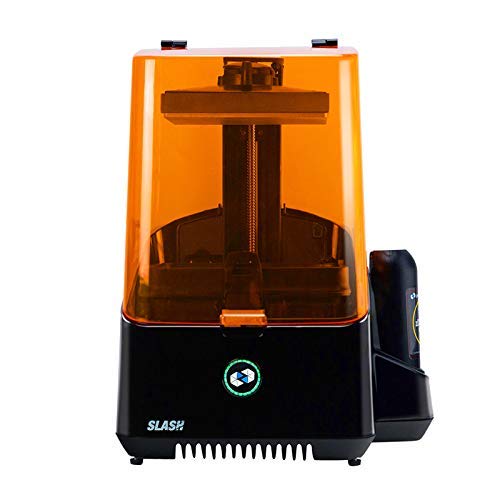
4. Uniz Slash 2 Plus
We’ve talked all about huge printing volume in the section above, as we’ve established the fact that the Peopoly Phenom has the largest build volume in our guide. However, certain makers don’t care too much about the volume of the print and would rather prefer having other perks, such as a high speed.
Well, if you’re one of these users that would gladly take speed over print volume, then the Uniz Slash Plus will definitely come as a big surprise for you. The Uniz Slash 2 Plus is simply the fastest desktop resin 3D printer you can find on the market at the time being.
However, it’s also accurate, thanks to the generous 8.9-inch 4K HD LCD light engine that it boasts. The Uniz Slash 2 Plus ensures a fast, accurate printing experience, whether you prefer printing large objects with fine details or a batch of smaller objects. The details seamlessly scale depending on the model size so that no detail is lost during the resizing process.
The Uniz Slash 2 Plus boasts a great resolution of 49.8 um and a layer thickness of between 10 and 300 um. All these features combined enable you to create flawless prints with almost no layer lines or ones that are not as visible as with other resin 3D printers.
It goes without saying that the Uniz Slash 2 Plus is actually an upgraded version of the previous model, the Uniz Slash Plus, and as most upgrades in the world of 3D printers, it came with a series of improvements to increase the quality of prints and help makers interact with the printers even easier.
First of all, let’s discuss strengths. It’s known (albeit not accepted by everyone) that resin prints are usually weaker than their FDM counterparts, and those who believe that are not entirely wrong. However, this has more to do with the material and a little less with the capabilities of the actual unit.
Be that as it may, the Uniz Slash 2 Plus can ensure that you’ll have strong prints, despite them being generated from resin. The upgraded light effect has undergone several improvements and has been augmented with an on-screen light intensity of 3400 mW per square centimeter.
This means that you can now use the Uniz Slash 2 Plus with virtually any dental resin on the market without affecting the quality of the print. As a result, you’ll get highly accurate and strong results no matter what dental resin you choose to go with.
Now let’s talk about speed for a while, which is undoubtedly one of the strongest points of the Uniz Slash 2 Plus. To put it shortly, the Uniz Slash 2 Plus is capable of printing dental molds (full plate) in merely 53 minutes, which is downright amazing.
The Uniz Slash 2 Plus can print a single layer in as little time as 6 seconds, making it truly stand out in the crowd as the fastest resin 3D printer on the market. It’s worth mentioning that during laboratory tests, the Uniz Slash 2 Plus has recorded printing speeds of up to 250 mm per hour.
By comparison, other similar printers can only rise up to 60-70, or even 80 mm per hour, so you can see why the Uniz Slash 2 Plus has been rightfully crowned as the absolute fastest desktop resin 3D printer on the market; it actually deserves this title.
The Uniz Slash 2 Plus also boasts a patented liquid cooling system called the UNIZ, which can provide the unit with efficient heat dissipation. This, in turn, can ensure that the powerful LED light engine can keep on working at very high levels and under intense conditions.
Thanks to its incredible speed, it’s easy to see why most of the application examples on the official website have something to do with teeth and dental molds: the fact that you don’t need to spend a lot of time waiting for the model to come out makes the Uniz Slash 2 Plus incredibly reliable in the Stomatology field.
Additionally, the fact that it’s not only fast but also very precise makes it a public favorite resin printer when it comes to creating dental models, flexible night guards, bonding trays, brackets, and even surgical guides.
However, that’s not to say you couldn’t or shouldn’t use the Uniz Slash 2 Plus for your own purposes. Regardless if you’re passionate about teeth or want a device that can print jewelry molds, miniatures, 3D-printed jewelry, or figurines, the Uniz Slash 2 Plus has got you 100% covered.
On the not-so-bright side, you understand that the incredible speed that the Uniz Slash 2 Plus can reach means that there might be certain things that this unit may lack, and we’ve already mentioned that the build volume is not exactly huge.
Don’t get us wrong, the Uniz Slash 2 Plus is an incredible machine, and its build volume is far from being small, but you also need to understand that there are certain models with larger print volumes on the market.
You’d expect that an absolute beast such as the Uniz Slash 2 Plus might be difficult to learn and/or master, but that’s absolutely not the case. The generous 4.3-inch touchscreen allows you to interact with the printer in an intuitive, streamlined fashion, whether you want to monitor the progress of a print, calibrate the unit, or simply adjust some of the device’s settings.
To wrap it up, if you’re looking for the ultimate resin 3D printer in terms of speed, then you definitely shouldn’t miss the Uniz Slash 2 Plus. It can print dental molds in as little as 53 minutes (full plate) and takes only 6 seconds to print an entire layer.
5. Zortrax Inkspire

Zortrax is a popular 3D printer manufacturer that produces both FDM and, as you probably may have figured out already, resin printers. The Zortrax Inkspire is an absolutely great piece of machinery that could help you create amazingly detailed 3D models with brilliant precision.
This 3D printer is fast, accurate, and features nifty features such as an Android operating system, wireless connectivity, an integrated UV lamp system, as well as semi-automatic platform calibration. For its price range, the Zortrax Inkspire is an absolute steal considering the plethora of features it provides you with.
When it comes to the build surface chapter, though, the Zortrax Inkspire is not exactly a power player, at least not if you compare it with other similar products on the market or ones that are in its price range. In fact, the Zortrax Inkspire features one of the tiniest build volumes in our guide.
To be more specific, if you go with this unit, you’ll benefit from a build volume of 132 x 74 x 175 mm, which essentially means that you won’t be able to create objects longer than 13.2 cm, wider than 7.4 cm, and taller than 17.5 cm.
For certain makers, this is not exactly an inconvenience since most makers don’t invest in a resin printer because they need to create large parts. Some others even go as far as to split a large object into several smaller pieces, create them separately, and then assemble or glue them together to create the larger part.
However, if you were prepared to be blown away by Zortrax Inkspire’s massive build space, you might be a bit disappointed. Don’t get us wrong, the fact that it’s not the largest one in the lot doesn’t make the Zortrax Inkspire a bad choice at all.
In fact, this resin 3D printer comes with an awesome selection of great features that could make you forget all about this minor hiccup. That being said, if the somewhat limited build volume didn’t drive you away already, you might as well just keep reading because you’re in for a treat.
First of all, it’s worth mentioning that the Zortrax Inkspire boasts a technology that uses a high-resolution LCD screen combined with UV LED backlighting in order to cure the resin layer by layer.
What makes Zortrax Inkspire stand out in the crowd is its incredible precision; to be more specific, this 3D printer has an XY resolution of 50 x 50 microns, and it can reach a minimum layer height of only 25 microns, which is truly remarkable.
Additionally, the printer has excellent speed consistency, meaning that the unit can maintain the same level of speed when creating objects, whether you create a large object on the build plate or choose to print several smaller ones. Not only that, but the accuracy level also stays consistent across all the printed parts you create.
It’s a widely accepted fact that printing supports for your objects is one of the biggest pains that a maker simply can’t avoid. And it’s not the printing of the supports that are causing this unpleasant situation, but their removal.
Regardless of the material you use or the shape of your supports, more often than not, removing these tiny scaffoldings can even lead to ruining the object you created. However, the Zortrax Inkspire exposes them to additional UV light so that they become more resilient (to support the model better) and easier to remove.
Many resin printer manufacturers make it so that their flagship devices won’t work with generic resin brands, or at least not as well as with the brands they design. However, Zortrax Inkspire truly supports and plays well with all resins that are available on the market, as long as they can be cured by light with a 405 nm wavelength.
The UV LCD technology that Zortrax Inkspire relies on helps maintain both precision and high speed at all times, and we’ll clarify that in just one bit. SLA printers usually work at constant precision. However, as the build plate becomes more crowded, an SLA printer will gradually slow down.
While that’s not exactly a problem in terms of quality print, it can become bothersome if you’re creating objects in bulk. Queue DLP machines that can print at constant speeds no matter how much of the build plate is occupied. There’s a minor drawback with DLP machines, though: they lose precision when workspace occupancy grows just as SLA loses speed.
Now it’s easy to understand why Zortrax Inkspire’s UV LCD technology can be a lifesaver in this situation, seeing as it can work at the same level of speed and precision regardless of how much of the build plate is currently occupied.
We’ve previously mentioned that the Zortrax Inkspire has incredible precision. Allow us to elaborate: the human eye is unable to detect individual pixels as long if the image exceeds 336 PPI (pixels per inch). Well, the Zortrax Inkspire exceeds this level.
That’s one of the reasons why this 3D printer is used in a broad variety of scenarios and fields, including but not limited to:
- Dental Care: printing surgical guides, braces, bridges, crowns, and dental impressions in a cost-effective manner
- Jewelry Design: 3D printed jewelry can come in handy in customer fitting and consultation
- Engineering: 3D printed parts can be quickly prototyped and used in fields where precision is required, such as electronics design
- Entertainment: comes in fairly handy if you need to create concept art for movies, TV shows, and even games
If everything we’ve already discussed in this section didn’t convince you that Zortrax Inkspire is the right tool for your projects, then check out a comprehensive list of specifications for this unit:
- Build volume: 132 x 74 x 175 mm
- Mechanically removed support (printed with the same material as the model)
- Semi-automatic platform calibration
- Integrated UV lamp as a light source (405 nm wavelength)
- Wi-Fi, Ethernet, and USB connectivity
- Android operating system
- Quad-core processor
- 4-inch IPS 800 x 480 touchscreen
- Works with CWS, SL1, ZIP, and ZCODEX formats
- Uses UV LCD technology
- 50 micron (0.05 mm) pixel size
- Layer thickness of 25, 50, or 100 microns
- Ambient operation temperature of between 20 and 30 degrees Celsius
- Storage temperature of between 0 and 35 degrees Celsius
- Maximum power consumption of 75 W
- 110 V 1.4 A 50/60 Hz or 240 V 0.85 A 50/60 Hz AC input
- Z-SUITE software that works with STL, OBJ, DXF, 3MF, and PLY files
- Built-in carbon filter to absorb resin fumes and filter them effectively
All things considered, if you want a ridiculously accurate resin 3D printer and don’t care much about having a huge build volume, then the Zortrax Inkspire is definitely worth checking out. It’s fast, it’s precise, and can provide you with unmatched quality of print.
View price on AmazonThe Best Professional Resin 3D Printers (Over $3,000)
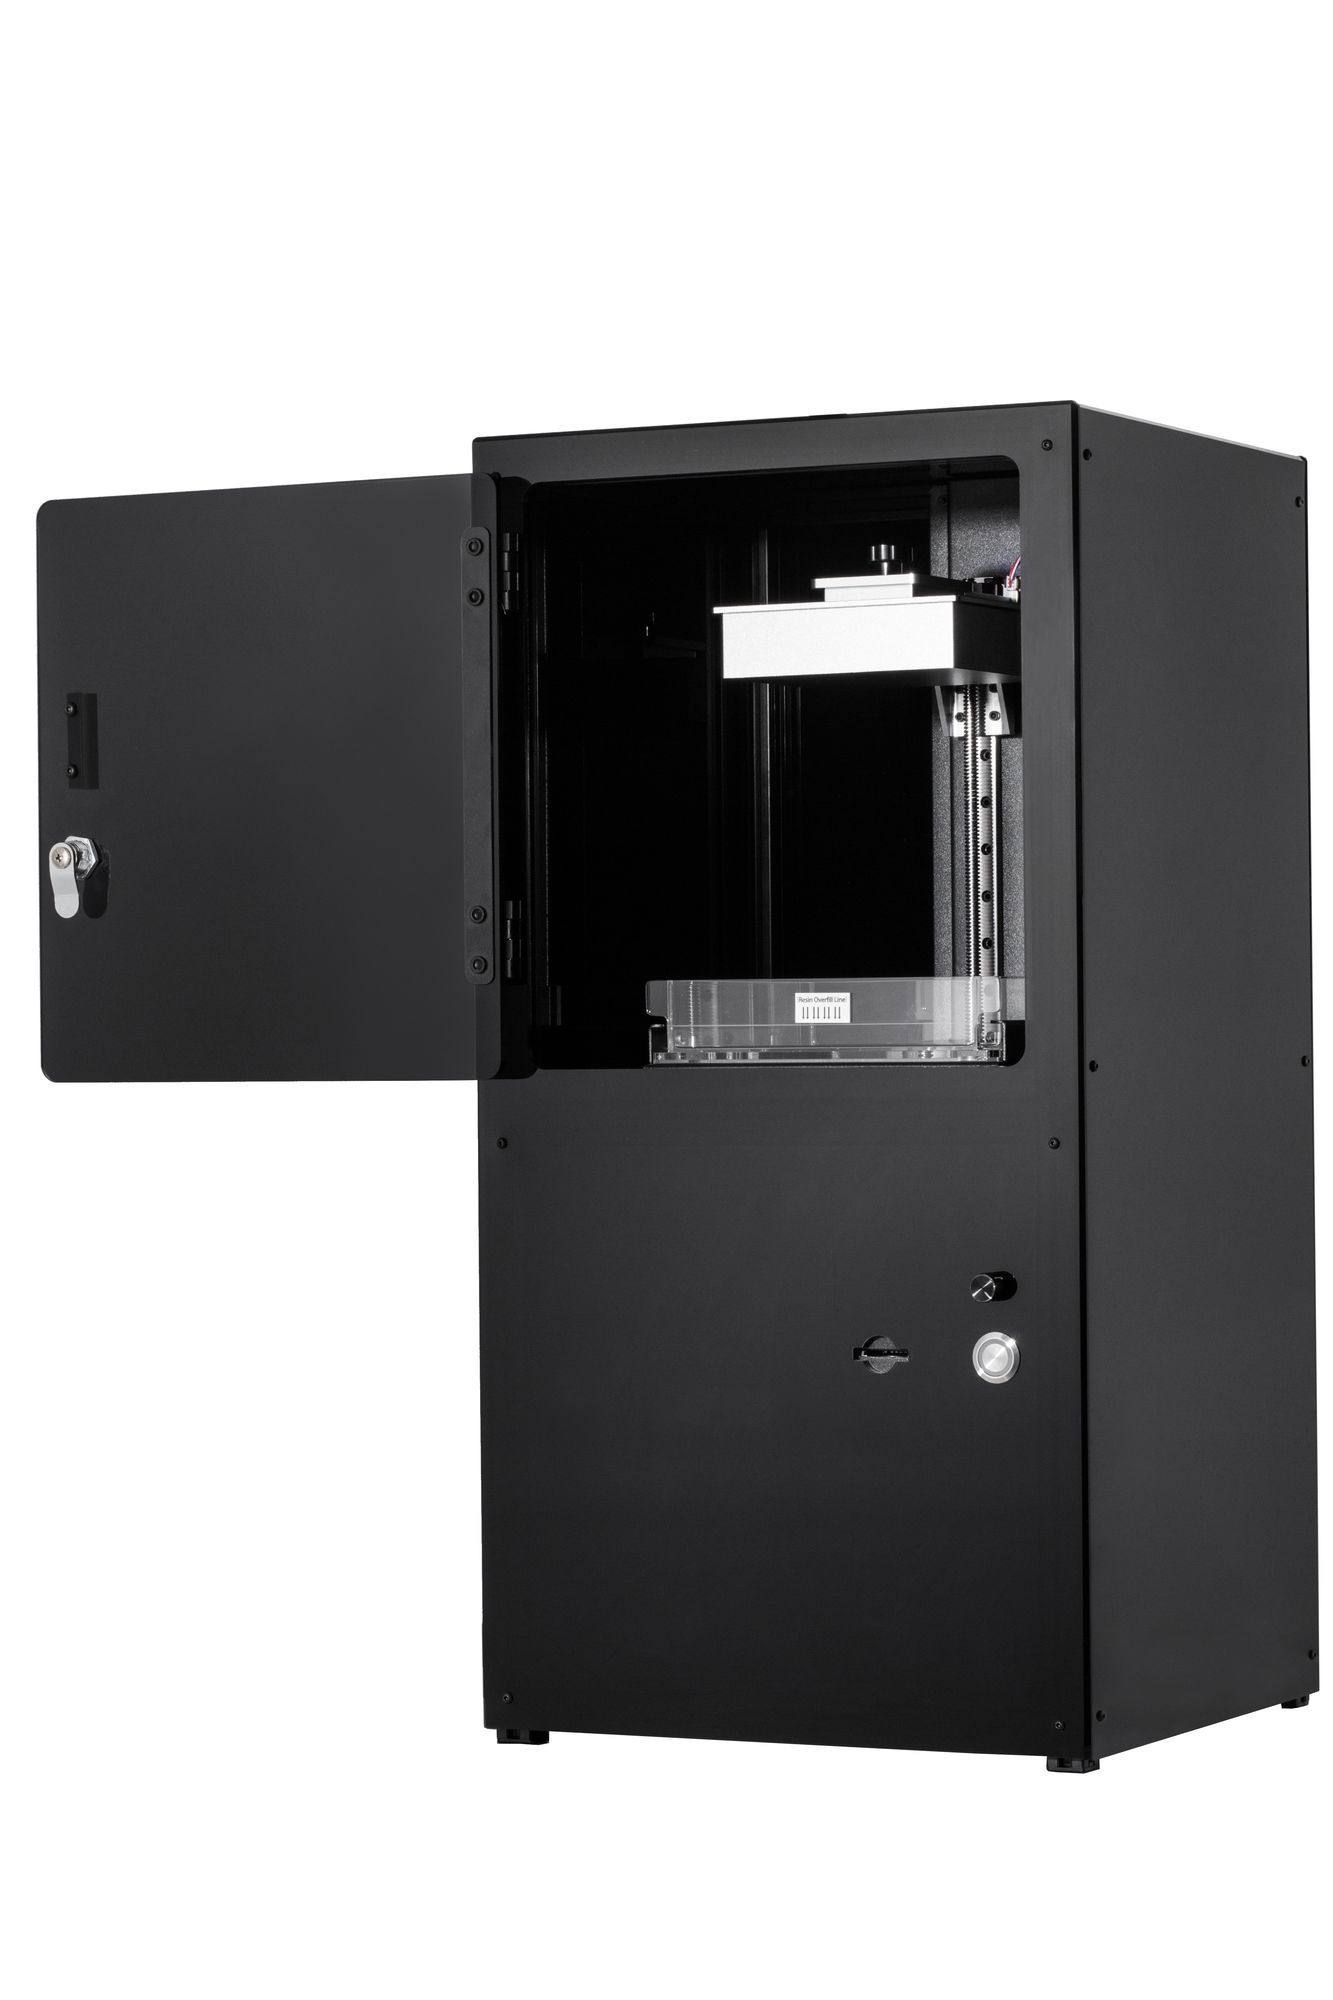
Formlabs Form 3
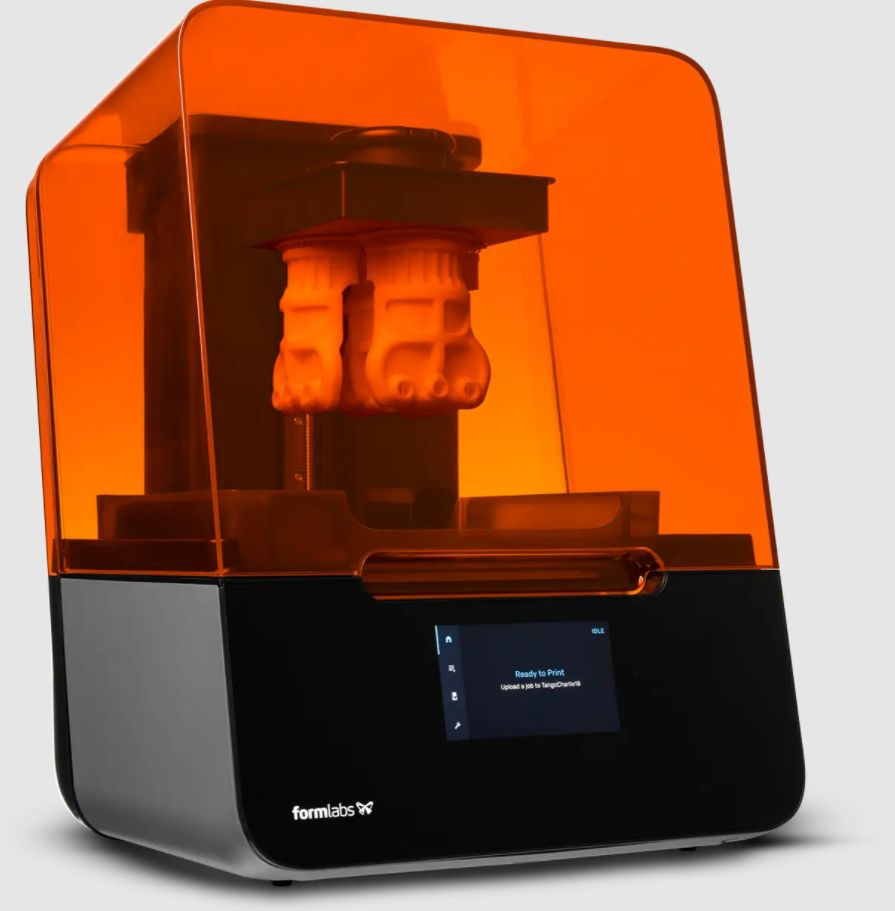
Formlabs Form 3 may be a tad expensive, but if you’re all about the quality of print, speed, accuracy, and relatively good build volume, then you’ll definitely want to check out this unit and discover all that it has to offer. Let’s just say that there are plenty of good reasons why this printer is in this price range.
First of all, let’s get the build volume out of the way, as it seems that this is one of the most important parameters that makers look after when buying a 3D printer (especially a resin 3D printer). The Formlabs Form 3 has a build volume of 145 x 145 x 185 mm, which is not exactly huge, but it’s not a tiny one, either.
Sure, you’d expect that a resin 3D printer that costs around $3,500 would be of leviathanic proportions, but the truth is that the print surface that Formlabs Form 3 boasts is just fine as long as you don’t plan on building objects of massive proportions. As long as your prints won’t exceed 145 cm in length, 145 cm in width, and 185 cm in height, everything should be perfectly fine.
Now with the elephant in the room out of the way, we can focus on things that matter most, such as print accuracy, quality of the print, the technology used, stability, sturdiness, and overall reliability. The general consensus is that the Formlabs Form 3 can ensure a flawless print without layers showing on the texture.
It’s quite important for a printer to be precise in order to create high-quality objects, so let’s take a look at what can Formlabs Form 3 do for us in terms of accuracy. First and foremost, it’s worth mentioning that this unit features a custom-designed LPU (Light Processing Unit) that’s built within the printer.
This LPU uses a smart combination of lenses and mirrors to ensure that your prints are accurate, and even more that you’ll be able to replicate a perfectly accurate print at some point in the future and get the exact same results in terms of print quality and precision.
The Formlabs Form 3 has a 25 um XY resolution and 250 mW worth of laser power so that your objects can be printed to reflect even the smallest details. It’s worth mentioning that the high-power laser passes through a spatial filter to ensure that you’ll get a clean laser spot.
Furthermore, the system comprises a parabolic mirror that’s used to ensure the perpendicularity of the laser beam on the build plane so that your prints will be uniform in terms of quality and accuracy across the entire build surface.
Several makers worry about translucent materials not printing the way it should, mainly due to the way they reflect the laser. LFS technology has an improved layer registration system as well as a neat surface finish. These can ensure that even translucent materials can be printed with absolute clarity right off the printer (without the need for various post-processing operations).
Another aspect that’s worth being mentioned is that the Formlabs Form 3 integrates a fairly large number of sensors that are used to monitor the entire print performance constantly so that you won’t be blindsided by potential issues that could arise during the printing operation.
As so, the sensors don’t only help the printer maintain optimal print conditions but also notify you about the state of your 3D printer so that you’ll know if there’s something wrong with it and troubleshoot the issue without significant effort.
The Formlabs Form 3 comes with an extensive array of optical sensors that calibrate and adjust the printer continuously for scale and power. Furthermore, these sensors are so sensitive that they’re even capable of detecting dust.
But it’s not all about performance, precision, and quality print; the Formlabs Form 3 is also a user-friendly machine, contrary to what you’d expect from a professional-grade resin 3D printer that comes with a plethora of advanced features.
The Formlabs Form 3 boasts a convenient cartridge system that facilitates material switching without breaking a sweat. Once you’re done working with a certain material, you just pop the old cartridge right out and place the new one within the printer. The unit will switch to the new material in seconds.
Furthermore, there are certain parts of the unit that are either deemed as consumables or they might require replacement every once in a while to ensure that the printer will have a long lifespan. For instance, you may need to replace the Light Processing Unit (LPU), optics window, or roller.
Well, you’ll be glad to know that all of these components can be easily replaced in-house. Therefore, you will save not only a lot of money but also the time that you’d have to wait for printer replacement part shipments to arrive.
If you find that the features offered by the Formlabs Form 3 are more than enough to meet your requirements, but the build volume is simply too small for your needs, you could consider upgrading to a Form 3L or a Form 3BL. There are certain differences between these models, but the most important ones are that the 3L offers a larger build volume (33.5 x 20 x 30 cm), and the 3BL supports biocompatible materials.
To find out more about the main features of each model (i.e., the Formlabs Form 3, 3L, and 3BL), you should check the extensive table below:
| Printer | Form 3 | Form 3L | Form 3BL |
|---|---|---|---|
| Technology | Low Force Stereolithography (LFS) | Low Force Stereolithography (LFS) | Low Force Stereolithography (LFS) |
| Build Volume (W x D x H) | 14.5 × 14.5 × 18.5 cm (5.7 × 5.7 × 7.3 in) |
33.5 × 20 × 30 cm (13.2 × 7.9 × 11.8 in) |
33.5 × 20 × 30 cm (13.2 × 7.9 × 11.8 in) |
| Resin Fill System | Automated | Automated | Automated |
| Resin Cartridges | 1 | 2 | 2 |
| Biocompatible Materials | No | No | Yes |
| XY Resolution | 25 microns (0.001 in) |
25 microns (0.001 in) |
25 microns (0.001 in) |
| Layer Thickness | 25 – 300 microns (0.001 – 0.012 in) |
25 – 300 microns (0.001 – 0.012 in) |
25 – 300 microns (0.001 – 0.012 in) |
| Laser Spot Size | 85 microns | 85 microns | 85 microns |
| Laser Power | One 250 mW laser | Two 250 mW lasers | Two 250 mW lasers |
| Supports | Auto-Generated Light-Touch Removal |
Auto-Generated Light-Touch Removal |
Auto-Generated Light-Touch Removal |
| Minimum Access Dimensions (W × D × H) |
40.5 × 53 × 78 cm (15.9 × 20.9 × 30.7 in) |
90 × 96 × 104 cm (35.4 × 37.8 × 41 in) |
90 × 96 × 104 cm (35.4 × 37.8 × 41 in) |
| Printer Dimensions (W × D × H) |
40.5 × 37.5 × 53 cm (15.9 × 14.8 × 20.9 in) |
77 × 52 × 74 cm (30.3 × 20.5 × 29.1 in) |
77 × 52 × 74 cm (30.3 × 20.5 × 29.1 in) |
| Weight | 17.5 kg (38.5 lbs) | 54.4 kg (120 lbs) | 54.4 kg (120 lbs) |
| Internal Temperature | Auto-heats to 35 °C (95 °F) | Auto-heats to 35 °C (95 °F) | Auto-heats to 35 °C (95 °F) |
| Operating Environment | 18 – 28 °C (64 – 82 °F) | 18 – 28 °C (64 – 82 °F) | 18 – 28 °C (64 – 82 °F) |
| Temperature Control | Air-heated print chamber | Air-heated print chamber | Air-heated print chamber |
| Power Requirements | 100–240 VAC, 2.5 A 50/60 Hz, 220 W |
100–240 VAC, 2.5 A 50/60 Hz, 650 W |
100–240 VAC, 2.5 A 50/60 Hz, 650 W |
| Connectivity | Wi-Fi (2.4, 5 GHz) Ethernet (1000 Mbit) USB 2.0 |
Wi-Fi (2.4, 5 GHz) Ethernet (1000 Mbit) USB 2.0 |
Wi-Fi (2.4, 5 GHz) Ethernet (1000 Mbit) USB 2.0 |
| Input | 5.5-inch touchscreen 1280 × 720 resolution |
5.5-inch touchscreen 1280 × 720 resolution |
5.5-inch touchscreen 1280 × 720 resolution |
| Notifications | Touchscreen alerts SMS/email via Dashboard Two LED status indicators Speaker for audio alerts |
Touchscreen alerts SMS/email via Dashboard Two LED status indicators Speaker for audio alerts |
Touchscreen alerts SMS/email via Dashboard Two LED status indicators Speaker for audio alerts |
The bottom line is that if you’ve been in need of a professional-grade resin 3D printer to create objects with a magnificent level of detail in a fast, easy manner, then the Formlabs Form 3 is exactly what you’ve been looking for. It brings an enormous amount of value to the table, and it’s simply the best resin 3D printer in its price range.
The only downside that you may not be willing to compromise on is that the build volume might not meet your expectations. However, if you need extra features such as an extra resin cartridge, more build volume, or even biocompatible materials support, you could upgrade to the Formlabs Form 3L or the Form 3BL.
[https://www.dynamism.com/formlabs/formlabs-3d-printers/formlabs-form3-basicpackage.html]
How Do Resin 3D Printers Work
Most resin printers are based on a technology called SLA, or Stereolithography. Although this alone sounds convoluted, the process behind it is not at all complicated if you take a minute or two to familiarize yourself with the concept and understand each of the steps that the printer takes when creating objects.
First and foremost, there’s a roller within a printer that spreads out liquid polymer (resin) in a very thin layer on the build surface. Now considering the fact that this layer is still in its liquid form, the roller will spread it over the entire build surface to ensure that every layer has an optimal level of thickness.
Now there’s another thing that you need to understand about this resin: it’s UV-sensitive, so when it gets exposed to the printer’s built-in UV laser, it solidifies. What the laser essentially does is draw the outline of the print into the layer of resin, and the part that’s touched by the laser hardens. By contrast, the parts that remain untouched by the laser will remain in their liquid state.
After the laser solidifies the resin, the model gets lowered a bit, then the roller spreads a new layer. The resin rolling part and the laser-assisted solidification processes go on and on until the model you’ve been trying to create is completely printed.
The final step of the printing process is when the model is raised out of the tank of resin. Since the resin that hasn’t been touched by the laser is still liquid, it will drip away back in the resin tank so that you can use it for your future printing projects.
Once the print comes to an end, you will have to remove the print manually and process it further by removing its supports, smoothen its surface, and paint it as you see fit. There are additional units that you can use to wash and cure your resin-printed models, but these are not a must to the printing operation (although they can make the objects look several times better than if you skip these processes).
Resin VS Filament 3D Printing
In the world of 3D printing, it’s worth knowing that there are two main categories of printers available: filament and resin 3D printers. Their names are pretty self-explanatory, so it’s easy to understand that filament printers can turn spools of filament into objects, while resin printers use liquid polymer resin.
Aside from the fact that they’re using different materials, FDM (Fused Deposition Modeling) and resin printers are also divided by a few more differences. With FDM printers, things are a bit simpler: you just load a spool of filament, which is fed through an extruder, to a hotend and nozzle mechanism.
The hotend melts down the filament and pushes it further down through the nozzle, which is moved by a series of motors as required to create a 3D printed model. Each model needs to be sliced in layers since FDM 3D printers process each layer individually and gradually. That’s actually a similarity between filament and resin printers, since both work with layers, only in different manners.
As a result of their simplicity, filament printers are preferred by most makers, especially when they need to create larger objects without a lot of detail. On the opposite end of this 3D printing field, you can find resin printers, which are generally not as capable of creating large objects as the filament printers (due to their usually reduced build volume), but they can be used to create objects with amazing fine details.
Although the FDM can’t achieve the same level of detail as resin printers, they are a lot cheaper, and the filament they use is also a lot cheaper than the resin. Their convenience stems from the fact that they’re easier to work with, cheaper, and don’t require a lot of maintenance.
Resin printers are not only more expensive than filament printers, as they also require a lot more maintenance and part replacements. The screen that is used to create the prints needs to be periodically replaced (depends on the printer, but usually, there’s an average of ~400 hours).
As opposed to the filament, the resin needs to be washed and post-processed carefully after the actual printing process comes to an end. Otherwise, the models won’t look as good as the ones you keep seeing from your favorite makers online. Furthermore, you need to wear protective gear while washing and post-processing, considering that most materials used during these processes are corrosive.
To wrap it up, if you need to create basic, tougher objects that don’t need a lot of detail, then you should definitely go with a filament (FDM) printer. On the other hand, if you need a lot of details on your printed objects (such as for medical models, jewelry, or dental models), you should choose the path of resin 3D printing.
Best Resin 3D Printers – CONCLUSION
To sum it up, there are several resin 3D printers on the market that could help you get started in the fascinating world of printing with resin. Although technically, both filament and resin printers serve a similar purpose (that of turning dull materials into fascinating works of art, gadgets, or replacement parts), at the same time, there is also a world of difference between them.
To put it shortly, filament printers are used to create sturdy objects without crazy details on their surface, while the resin printers can’t (usually) work at the same scale as FDM ones, but they can create objects with an amazing level of detail.
Since there are so many resin 3D printers on the market, we’ve figured that you may be having a hard time telling the differences between them (except for the obvious size and price ones), so we compiled a list that comprises some of the best resin printers your money can buy at the time being.
Not only that, but we also split the products in our guide into three distinct categories based on price: budget printers (under $1,000), desktop printers (between $1,000 and $3,000), and professional-grade printers (over $3,000) to help you get started easier. You just have to head to the category that fits your budget and go on from there.
Note that while most of the time a higher price means a larger build surface or better features, sometimes this rule may not be appliable. Therefore, we suggest that you carefully analyze the features of the product you’re about to purchase before actually buying it. Our guide should be a great starting point in this situation.
FAQ
What are resin printers good for?
If you’re thinking about buying a resin 3D printer but don’t understand precisely what they’re good for, you should know that they’re excellent at creating smaller objects that have a lot of detail. For instance, you can use them to create miniatures, figurines, models, jewelry and jewelry molds, dental braces, surgical models, dental models, medical models, and even watertight prototypes and parts with smooth surface finishes and fine features.
How dangerous is resin printing?
The answer to this question depends on the safety measures you’re willing to take while printing with resin. First and foremost, you have to understand that printing with resin will release some unpleasant fumes, but luckily, most 3D printers come already built within an enclosure, and some of them even have built-in activated charcoal filters to absorb and filter these fumes. If you keep the enclosure closed at all times during printing and ensure proper ventilation, you should be fine. Other safety measures may include wearing protective gear while post-processing the printed objects (seeing as these materials are usually corrosive), protecting your eyes, and obviously not drinking the resin in its liquid form. Also, make sure not to touch the resin directly before it’s 100% cured, and avoid letting it go near your eyes or mouth.
Is resin printing cheaper?
Absolutely not. In fact, not only do the actual printing units (i.e., the resin 3D printers) cost a lot more than filament printers, but also a bottle of generic resin costs a lot more than a spool of filament, even more than brand-name filament spools. Furthermore, printing resin means that you need to wash and post-process the printed object once the printing is over, and unless you plan on doing that manually, you’ll also need to purchase a special machine for these purposes.
Which is better: FDM or resin?
It depends on what you’re planning to do with your 3D printer. If you want to create tougher and larger objects that don’t need a lot of fine details, then FDM is definitely better in this specific case (for you). However, if you want to create objects that have a great level of detail, even at a much smaller scale, then resin is the one that fits your needs best. The same goes if you need a printer that can create several smaller parts at the same time.
Can resin fumes kill you?
Not unless you’re really dedicated to spending a huge chunk of your life surrounded by resin fumes and inhaling them on a daily basis for more than 10 years. However, these fumes smell really bad and can induce a condition known as TIP, or Toxic Inhalation Psychosis. Be that as it may, you should make sure that you stay as far away from resin fumes as possible by opting for resin printers with built-in activated charcoal filters and airtight enclosures, and also make sure to ventilate the room you’re printing in to avoid any resin fumes lingering after you open the enclosure.
How long does a resin print take?
It depends entirely on the capabilities of the resin printer that you’re using. Low-end printers could take several hours to bring a print to completion, whether you’re printing a large object or several smaller ones, while other printers that are more expensive could offer you incredibly high printing speeds. The Uniz Slash 2 Plus, for instance, can reach a dizzying printing speed of 250 mm per hour and takes only 6 seconds to print a layer.
Why are my resin prints brittle?
Over-curing, your resin 3D, printed objects could lead to increased brittleness. For instance, if you overexpose your resin print to IPA (Iso-Propylic Alcohol), acetone, or UV light, it will lead to brittle resin prints.
How fragile are resin prints?
Compared to filament prints from PLA, PETG, nylon, or ABS, resin prints are more brittle. On the bright side, they’re also more resistant to chemicals and temperature than filament prints. The bottom line is that if you want to print strong objects, you should use filament and an FDM printer.
The post The Best Resin 3D Printers of 2021 – Here’s How to Pick the Right One for You appeared first on DIYs.com.