

How to Install Homebridge on a Raspberry Pi
Posted by admin on
While you can build several outstanding projects with your Raspberry Pi, one of the most useful is setting up a Homebridge server. Homebridge allows HomeKit support for devices that aren’t supported natively in Apple Home.
With Homebridge, you can use Apple HomeKit with devices such as Nest and Nest cameras, Ring cameras and doorbells, TP-Link Kasa switches, Belkin WeMo devices, and even your Tesla vehicle. Today, we’re going to show you how to get Homebridge working in your smart home using a Raspberry Pi.
What Is Homebridge?
Homebridge is a lightweight open-source server that runs on Node.js. Its primary function is to emulate the iOS HomeKit API. Simply put, the smart devices in your home talk to Homebridge via plugins, and Homebridge relays that information to Apple HomeKit. HomeKit, in turn, relays information to Homebridge, which then controls your smart devices.
This communication allows users to operate devices via Apple Home that they wouldn’t be able to control natively. That opens up quite a few possibilities for folks looking to customize their smart home. In addition, the UI is intuitive, the software is free, and getting Homebridge set up takes less than an hour.
Once Homebridge is configured, all of your devices will be visible within the Apple Home interface, and they should function like any other smart device that currently supports HomeKit. You’ll also receive notifications when a device is offline, and you can set up customized automations.
If you, for example, want to have all the lights turn off when the last person leaves your home, Homebridge makes it possible. Homebridge also opens the door to many of Apple’s shortcut functions, providing almost limitless automations.
What You’ll Need for This Project
You are going to need a few items to get Homebridge working. They are:
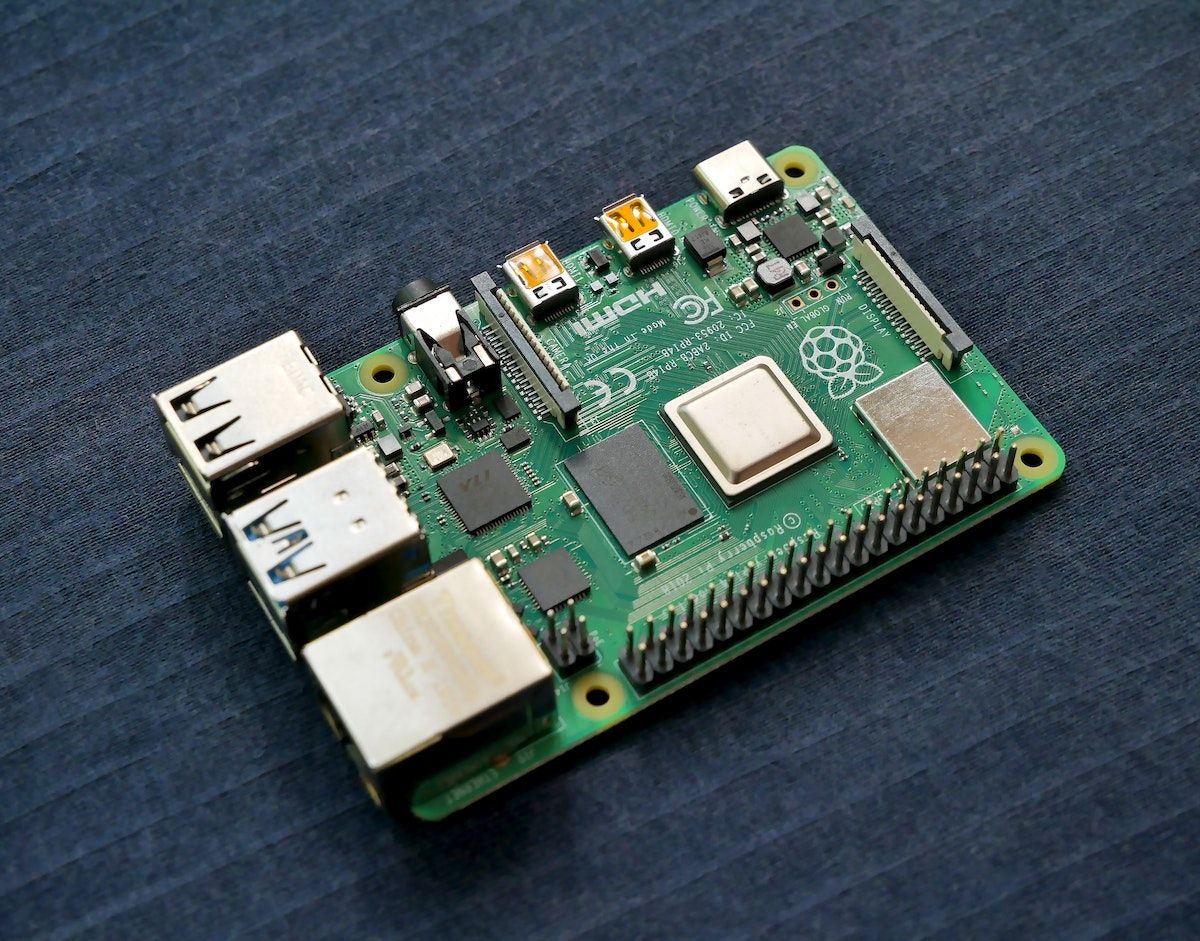
- A Raspberry Pi (3B or better)
- A microSD card (64 GB or more)
- The official Homebridge Raspberry Pi Image
- A computer with an internet connection
- An etcher program such as balenaEtcher or the official Raspberry Pi Imager
Related: How to Install an Operating System on Your Raspberry Pi
Download and Install the Official Homebridge Image
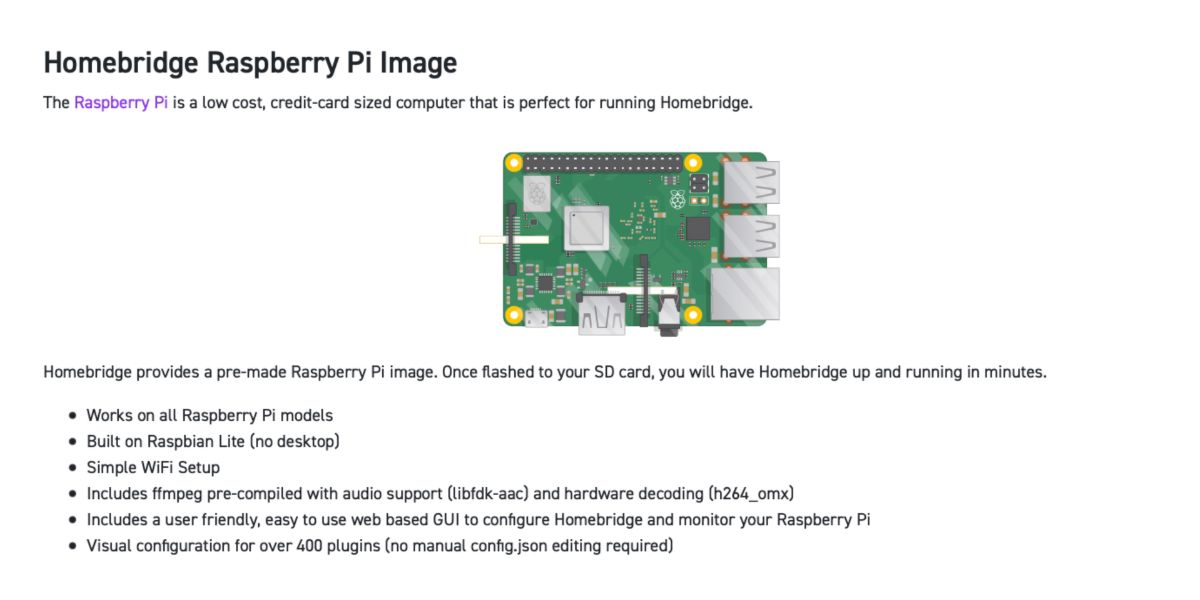
There are four steps to installing the official Homebridge image with balenaEtcher. They are:
- Download the official Homebridge Raspberry Pi image
- Insert your microSD card into your computer and open balenaEtcher.
- Select your image file. This file is the Homebridge image you downloaded.
- Select your target, which is your microSD card, and tap Flash!
The process of flashing the image should only take a few minutes. When the etcher finishes, eject your microSD card, and insert it into the microSD card slot on your Raspberry Pi (ensure it’s off before installing). Then, power on your Pi to continue.
Connect to the Raspberry Pi and Update
Once your Pi is on, go back to your computer, and open a web browser. Navigate to homebridge.local. If you’re prompted for a login and password, the login is: admin, and the password is: admin.
The site should load the configuration for Homebridge. The process may take a few minutes, and Homebridge will also check and install any updates.
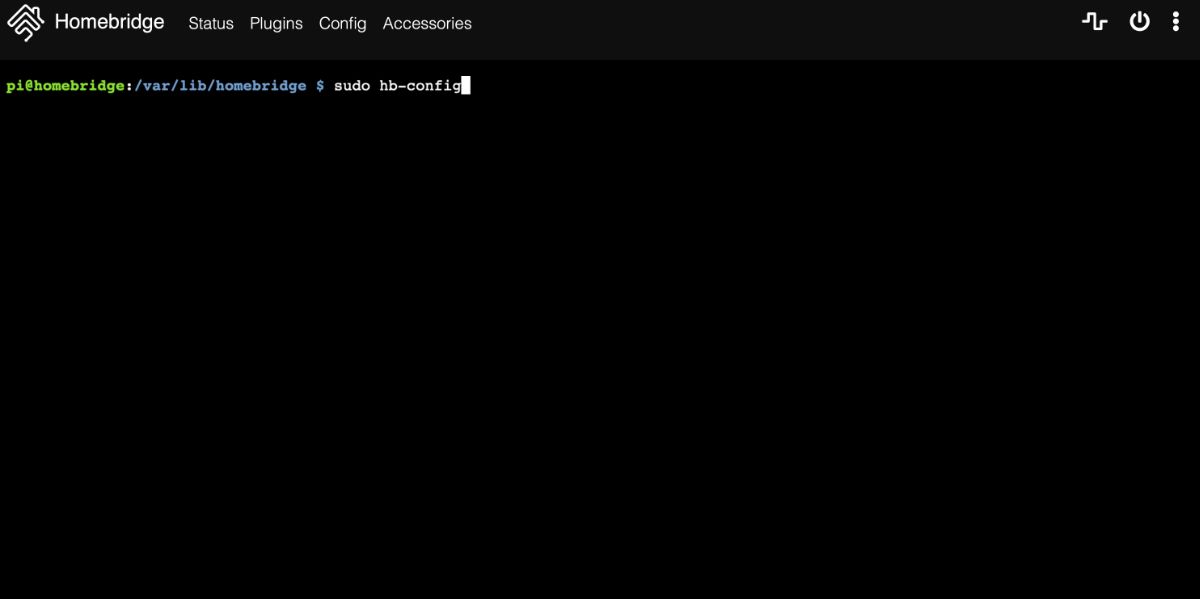
Next, you want to make sure your version of Node.js is the most current. In the top-right corner of the screen, you’ll see three vertical dots. Click those dots, and a hamburger menu should pop up. Click Terminal, and the screen will change to the command line.
In the command line, type:
sudo hb-configThis command will open a window where you can select Upgrade Node.js to the latest LTS version. Once selected, the Node.js installation will update, or you’ll receive a message that the version is already current. That’s it! Homebridge is now installed.
Changing Your Default Homebridge Password
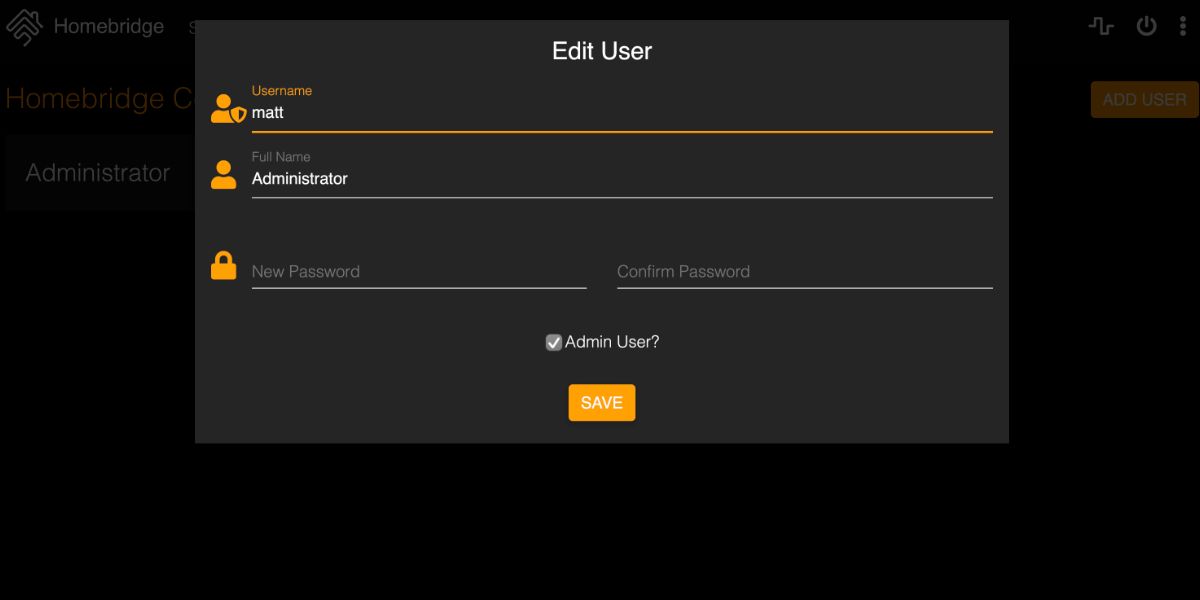
One of the first things you’ll want to do is to change the default password for Homebridge. Click the three vertical dots in the upper-right corner, then click on User Accounts. Click Edit. Enter an Administrator name and password, then click Save.
Make sure you save this password because if you lose it, you won’t be able to log in to your Homebridge server unless you reinstall.
Searching for Plugins
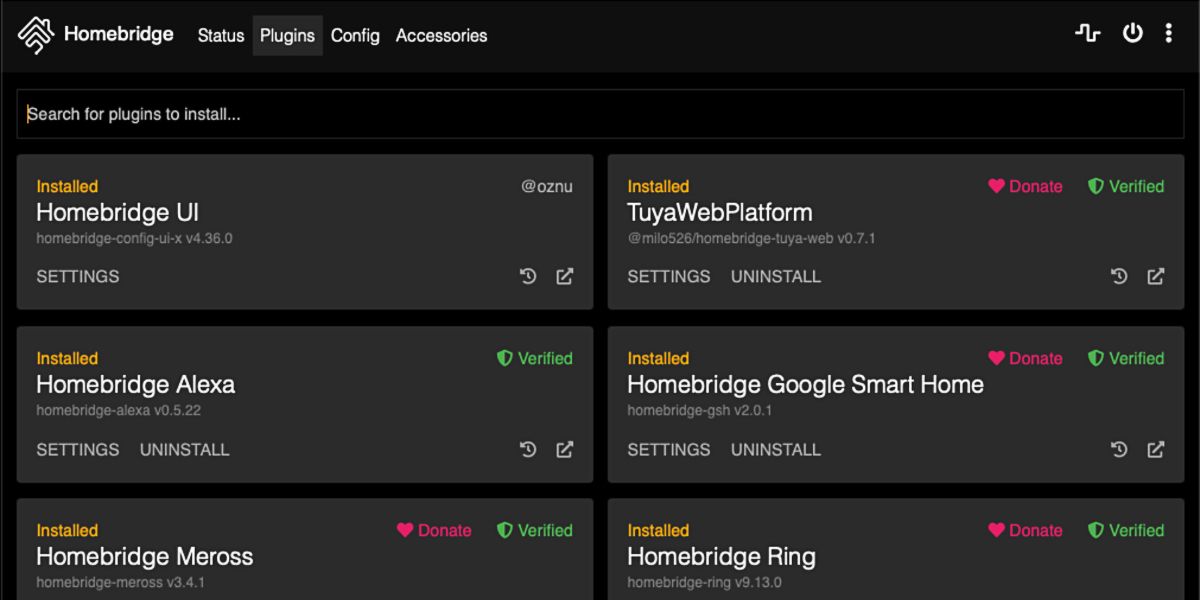
Homebridge uses plugins to communicate with your devices. To install plugins, first, click on the Plugins menu. Then, type the plugin’s name into the Search for plugins to install… box.
We recommend only using plugins that have the green Verified symbol next to their installations. Verified means that the Homebridge project team has reviewed these plugins and that they meet the requirements for a “trouble-free user experience.”
Many of these plugins require configuration, but each should have detailed user guides to walk you through the process. Installed plugins usually look the same. On the plugin page, you’ll see SETTINGS under each plugin name. If the word UPDATE appears next to settings, then the plugin has an update available.
You’ll also see a wrench icon on the right side of the plugin “box.” That wrench allows you to revert to a previous version if you’re having trouble with the plugin. Finally, the far-right icon, which looks like a box with an arrow pointing up and to the right, links to the official GitHub readme for that plugin. Clicking this link allows you to read more about configuration, check FAQs, and view version history.
Related: How to Set Up a Minecraft Server on Raspberry Pi
Using Homebridge With HomeKit
Now that you've installed Homebridge, you’ll want to set it up to work with Apple HomeKit. Here’s how to do that:
- Open the Home app on your iOS device
- In the upper-right corner, tap the + symbol
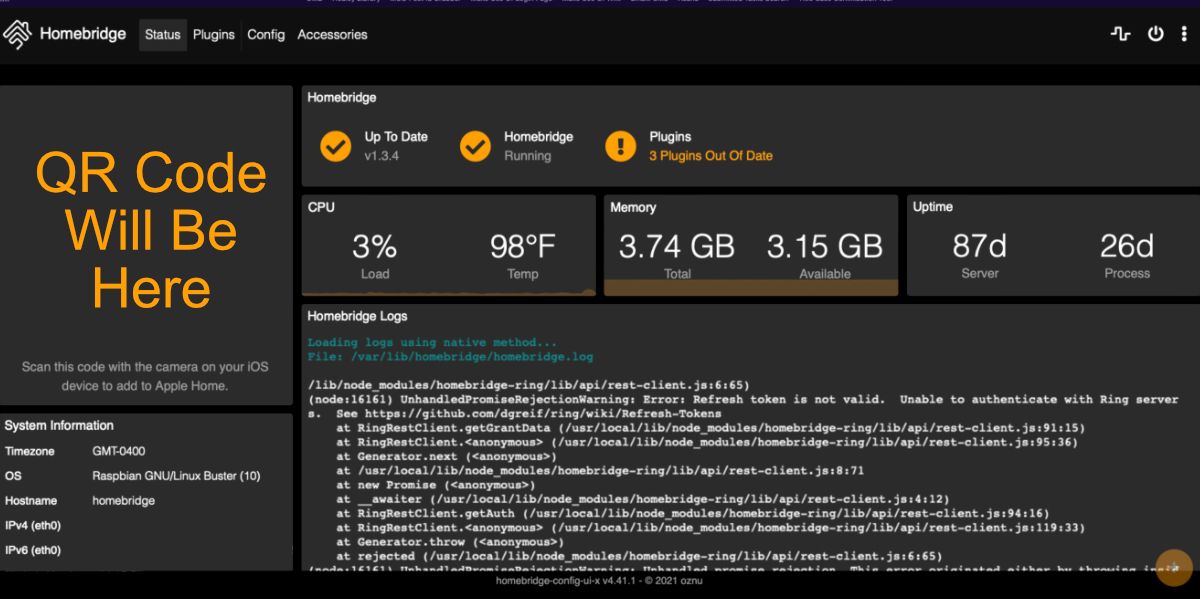
- Tap Add Accessory, then scan the QR code that appears in your homebridge.local dashboard.
If you haven’t configured any accessories or added any plugins, you might receive a message stating Additional Set-up Required. Don’t worry about this message. Once you install a few plugins, the message will go away.
Homebridge Best Practices
After using Homebridge for a while, you may notice your plugins are out-of-date. Developers are constantly updating their plugins to squash bugs and improve performance, but there is no way to know about these plugin improvements.
Once a month, we advise users to log into their Homebridge server and check for out-of-date plugins. Doing so will keep everything current and can eliminate potential problems with deprecated versions. It’s also a good idea to reboot the Homebridge server every few months. If a device stops working with HomeKit, then rebooting is one of the best tricks to fix things.
Additionally, if you notice red or yellow text on your Homebridge dashboard feed, there’s a good possibility that something has gone wrong. In these cases, you’ll need to update or reinstall the offending plugin. You may also have to change some configuration options.
Related: The Best Raspberry Pi Projects for Beginners
Enjoy Your New Homebridge Installation
Homebridge is a remarkable tool for smart home automation. It allows you to control inexpensive devices using the Apple devices you already own. In addition, the software is free to use, widely supported in places like GitHub, and is customizable for individual smart home setups.
However, the best part is just how simple it is to get working with your current smart home. And with the new official Raspberry Pi image, setting up Homebridge is easier than ever. So if you have a spare Raspberry Pi sitting around collecting dust, give Homebridge a try. We think you’ll enjoy it.