Best 5.25″ Front Panel Cooling Fan Controller
Posted by admin on
RGB lighting has been getting more and more popular in recent years. If you’ve got a gaming PC with a see-through case, an RGB light kit is practically mandatory. It highlights all the gorgeous parts that would otherwise be hidden behind an aluminum panel. Nowadays, you can buy just about any type of lighting you want. From individual colors to rainbow patterns to lights that cycle through different colors. You can even use software to make your lights match what’s going on in your game.
The problem? RGB lights put out a lot of heat. And if you’re running, two, three, or four light strips, you’re talking about significant stress on your system. RGB lighting is great, but it’s not worth frying your CPU or your graphics card. One obvious solution is simply to add more fans. Liquid cooling systems are another option, but they’re difficult to install. And if you don’t know what you’re doing, it’s easy to screw things up. Fans, on the other hand, are pretty straightforward. Install them, plug them in, and you’re good to go.
A cooling fan controller simply gives you a hardware tool for managing your fans. And today, we’re going to review three of the best on the market. First off, we’ll review the Thermaltake Commander F6 RGB. The Commander F6 is an old-school controller with easy-to-use dials, and the ability to control six fans. Next, we’ll look at the Aerocool V12XT Fan and Temperature Controller. This controller looks like a speedometer, with a touchscreen control that’s easy to operate. Finally, we’ll check out the Kingwin FPX-007. This is one of the most modern-looking fan controllers available, and looks like it popped right out of Star Trek. Which controller is best for your gaming rig? Let’s find out!
Thermaltake Commander F6 RGB
The Thermaltake Commander F6 RGB is one of the most powerful controllers on the market. It can manage six different fans at once, ideal for even the most outrageous RGB lighting schemes. If you’re trying to cool an exceptionally robust rig, look no further. The control panel features a row of six black anodized aluminum knobs. The edges are beveled, with a silver finish that adds a bit of flash to the front of your battle station. Above the knobs, there’s a bright LCD display that shows your fan status and the temperature of your rig. You can adjust the color of the display between 16 different colors. Regardless of your PC’s RGB settings, you can be assured that the LCD display will match.

In terms of physical construction, the Commander F6 is designed to fit in a single 5.25-inch drive bay. If you’re still rocking a 5.25-inch hard drive, you’ll still have plenty of space above or below. It draws on SATA power, which should be sufficient to operate all six fans. Provided your power supply is up to the task, you’ll be ready to rock. The fan controller leads are about a foot long, and will control any 3-pin fan. This isn’t a limitation, since 4-pin fans control their own speed. If you’re using a controller, why spend extra cash for 4-pin fans?
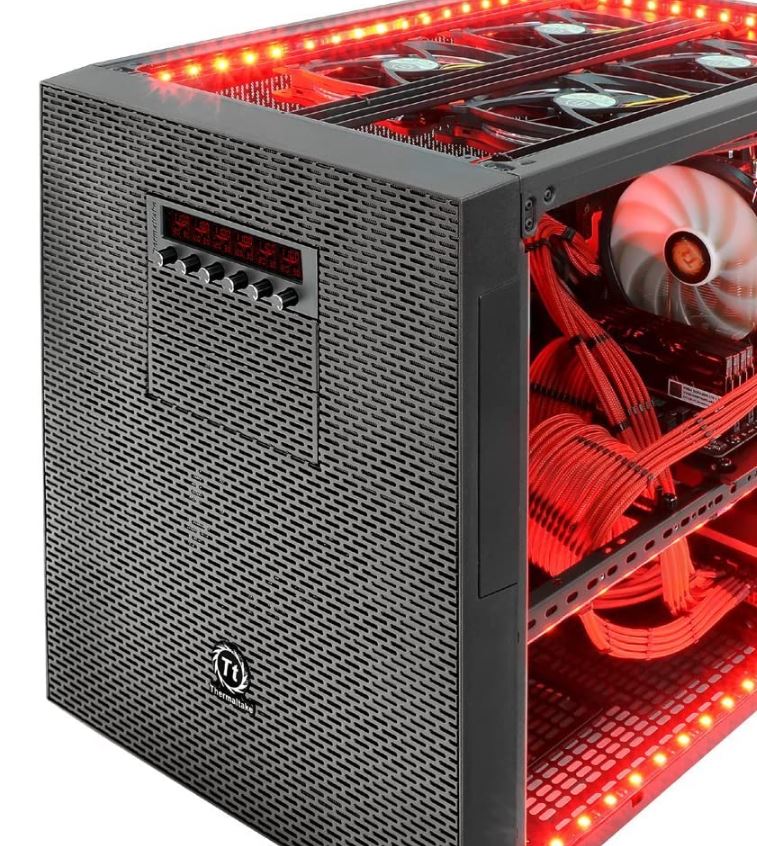
You also get the ability to monitor six temperature sensors, with standard-sized probes connections. As a result, the Commander F6 is compatible with just about any temperature sensor on the market. The kit includes all the mounting screws you need for installation. You also get Thermaltake’s one-year manufacturer’s warranty. This is more or less standard for most electronics. If they don’t fail in the first year, you’re generally good to go.
How it Works
The Commander F6’s control knobs are extremely sensitive. You can adjust the voltage to each fan in 0.1-volt increments, which is finer than almost any other controller. You can also adjust the voltage across a very wide range. From 0 to 12 volts, you have complete control over your fans. Now, most people are never going to actually need this kind of ultra-fine control. But it’s nice to have the option. In addition, the controller features short circuit protection to prevent it from getting damaged.
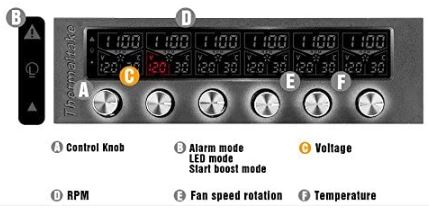
There are two ways of operating the Commander F6: automatic and manual mode. In automatic mode, you set a threshold temperature for your cooling system. When the temperature rises above that level, the fans will automatically power up to compensate. Alternatively, in manual mode, you set your fans’ voltage and it stays there. You can still set a threshold temperature in this mode, but an alarm will sound when the temperature passes it. Be warned: the alarm is very loud. This is a good thing for your PC’s safety. On the other hand, if you run your computer 24/7, it can interrupt your sleep cycle. To avoid getting woken up by a computer alarm, just set the controller to manual.
Aerocool V12XT Fan and Temperature Controller
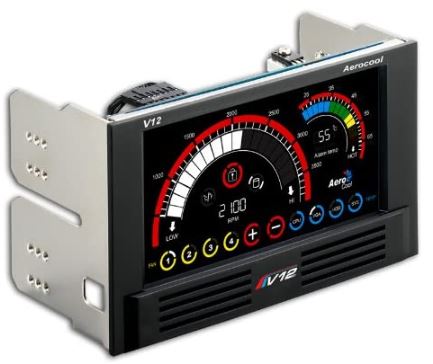
The Aerocool V12XT Fan and Temperature Controller looks like the display console on a racecar. It has a semicircular temperature gauge to the left, with a smaller, tachometer-style temperature gauge to the right. Both gauges are very colorful, which provides plenty of style on the front of your PC. The temperature gauge is particularly well-designed. The first quadrant is blue, the next quadrant is green, the next quadrant is yellow, and the last is red. As the temperature rises, you’ll get a great visual indicator of what you’re at.
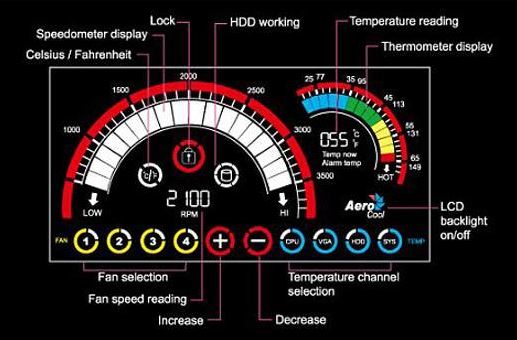
Along the bottom of the display, there’s a row of buttons that let you switch between different fans. You can also switch between different temperature gauges, and adjust the settings. In all, you can control up to four sets of fans and temperature sensors. This isn’t quite as impressive as the Thermaltake’s capabilities, but it’s still fairly robust. If you need more than four fans, you’re running a very hot system!
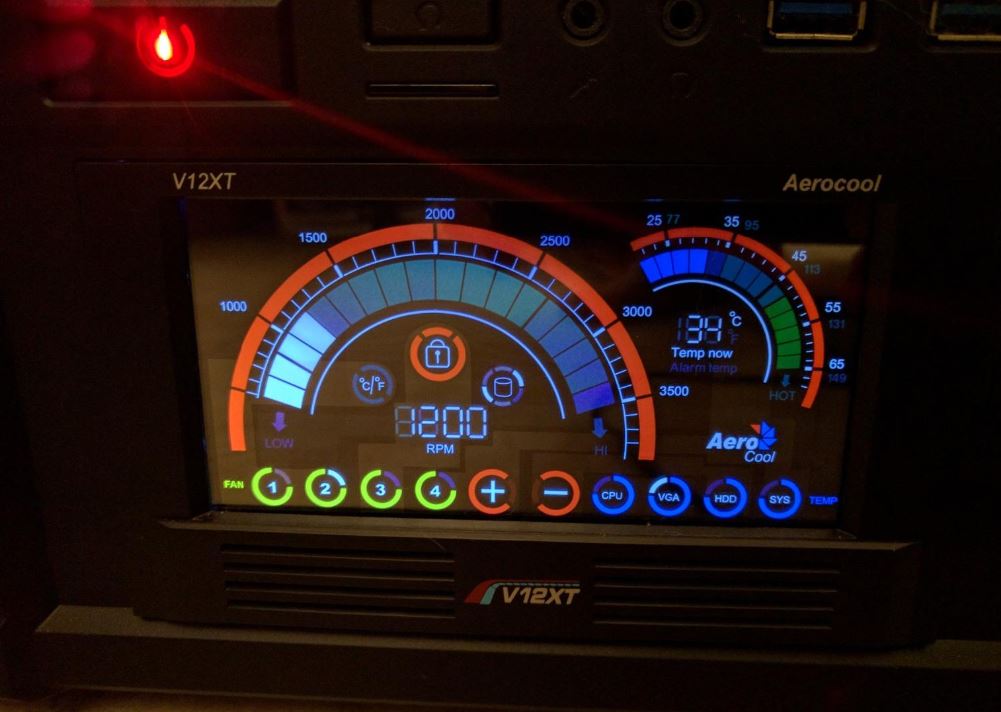
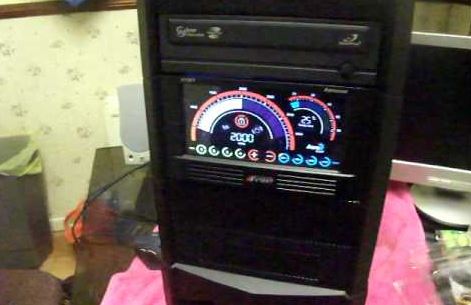
As you can imagine, this touchscreen display occupies a lot of real estate. The V12XT occupies not one, but two 5.25-inch slots on the front of your case. This may or may not be a problem, depending on your case and hard drive configuration. The front panel frame is constructed from matte black ABS plastic, and the mounting brackets are steel. The fan cables are about a foot long, which should be plenty for most systems. But if you need more length, there are two additional spare fan extension cables.
Like any well-designed fan controller, the V12XT supports 3-pin fans. It also uses standard probe-style connectors for your temperature sensors. In addition to the unit itself, you also get a few extras. To begin with, you get eight mounting screws. More impressively, you get a pair of spare thermal sensors to cover your needs. Finally, you get six strips of thermal sensor tape for attaching your sensors.
How it Works
The V12XT adjusts your fans based on RPM, not on voltage. That said, it supplies up to five volts maximum to each fan. This should be enough for most purposes. That said, if you’re going to run some overpowered fans, you’re going to be out of luck. As Scottie said in Star Trek: “We need more power!”
Like the Thermaltake controller, the Aerocool controller allows you to operate in manual or automatic mode. In manual mode, you set the fan speeds and leave them be. You also set a temperature threshold, and an alarm will sound when the threshold is reached. Alternatively, in automatic mode, you set a desired temperature, and the fans will automatically adjust to reach that speed. You can still set a threshold in automatic mode if you so desire.
One common complaint about the V12XT is that the display pad beeps every time you touch it. This can get irritating, but it’s only relevant when you’re changing the settings. In addition, you get a couple of added benefits. First off, you can turn of the LCD display. This is a great feature if your PC is in your bedroom. Secondly, you can switch between centigrade and Fahrenheit. Most people, even Americans, use centigrade for computer temperatures. But it’s nice to have the choice to use a more familiar temperature scale.
Kingwin FPX-007
If you’re searching for the most modern-looking fan controller on the market, it’s tough to beat the Kingwin FPX-007. The display shows the fan speed on the left, and the temperature on the right. Like the Aerocool, the FPX-007 has a color-coded display, ranging from blue to red. In the center, you can choose between different fans and temperature sensors. The selector has a honeycomb-style design, which looks very futuristic. That said, each button chooses both a sensor and a fan. Ideally, you’ll want to pair your fans and sensors, so you can view the relevant sensor with the relevant fan.

In total, you can control a total of five fans and five sensors. The fan connection cables are 3-pin, which is standard for this type of controller. And the temperature sensor cables use a standard probe-style design. The power connection is Molex, not SATA, which is easier to connect on many systems. That said, if your motherboard doesn’t have a Molex output, you’ll need a Molex to SATA power adapter. The controller doesn’t operate based on voltage. Instead, you control your fan speed based on the RPM. For most people, this is going to make more sense.
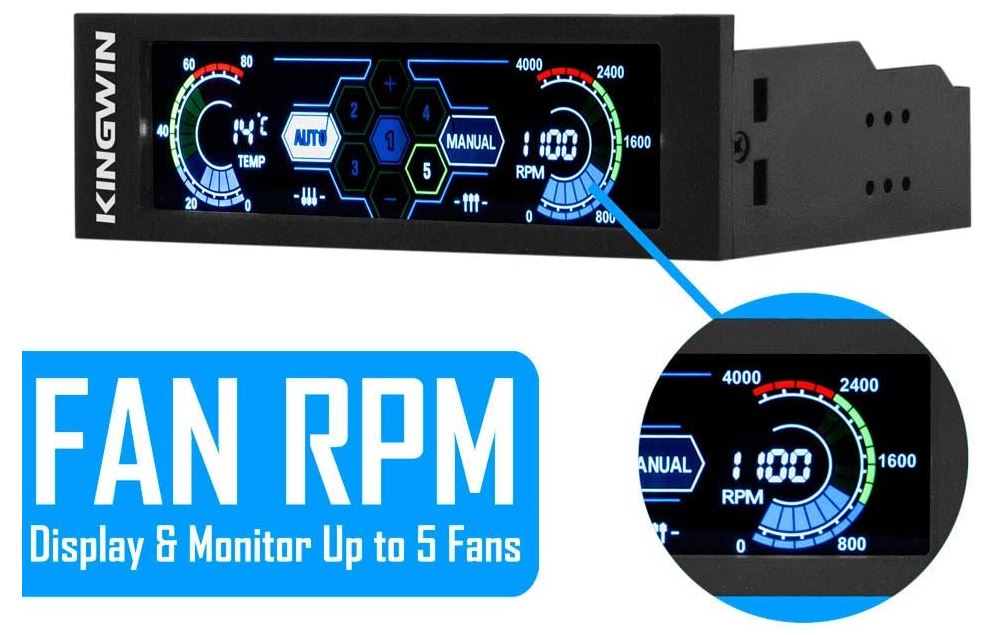
The front plate of the unit is constructed from matte black ABS plastic. The mounting frame is constructed from a matching matte black anodized aluminum. It fits in a single 5.25-inch bay, which leaves plenty of space for a standard, 5.25-inch hard drive. As you’d expect, all the mounting screws are included in the kit, so you won’t have to buy extra hardware.
How it Works
The FPX-007 will provide up to 10 watts per channel. This is sufficient for the vast majority of fan systems. Moreover, you can choose between centigrade and Fahrenheit. This provides plenty of options for users the world over. As with our other options, you can run the controller in automatic or manual mode. Be aware that manual mode will sound an alarm when your system reaches your threshold temperature.

The LED display can be very bright, particularly if you’re trying to sleep. In all fairness, this can get annoying. Thankfully, Kingwin has provided a solution for this problem. In the package, you’ll see a jumper cable. By using this cable, you can adjust the brightness to a lower level. On the back of the controller, there’s a 2-pin jumper cable connection marked “60%”. Connect the jumper to this connection, and the panel will dim to 60 percent. It’s not a perfect solution, but it gets the job done.
Final Verdict
So, where does all this leave us? Let’s quickly recap what we’ve learned about each of these controllers. To begin with, the Thermaltake Commander F6 RGB is best for systems with a lot of fans. With the ability to run six fans, you’re not going to be disappointed. In addition, you can supply up to twelve volts to each fan, which is a major plus. On the other hand, the manual controls might turn some people off. But they’re very sensitive, and they lend a retro look to an otherwise-modern component.
The Aerocool V12XT Fan and Temperature Controller is probably the easiest to use. Its racecar-like design is attractive to look at, and it’s also functional. Moreover, it operates on RPM instead of voltage. This gives you an easier-to-use metric for how fast your fans are running. The 6-volt limitation might be problematic for some fan systems. But the ability to shut down the display altogether is a significant benefit.
Finally, we looked at the Kingwin FPX-007. If you want a truly futuristic appearance, this controller is tough to beat. In addition, you get 10 volts of power to each fan, more than enough for most systems. The inability to completely deactivate the display can be annoying. But if your PC isn’t in your bedroom, this won’t be an issue.
The post Best 5.25″ Front Panel Cooling Fan Controller appeared first on Nerd Techy.


